IDP Initiated Login with Okta and AccessManagement 2.0 via SAML 2.0
Introduction
In AccessManagement 2.0, an IDP-initiated login enables users to begin the authentication process directly from an Identity Provider (IDP), like Okta, instead of a Service Provider (SP) or application. In this flow, the IDP sends a SAML authentication response to AccessManagement 2.0, which verifies the response and grants the user access to the target application. Common in SAML-based single sign-on (SSO) configurations, this approach allows users to log in from a central IDP-managed portal, streamlining access across applications and improving user experience with a single, centralized login point. Here, we will detail how to set up an IDP-initiated login between Okta and AccessManagement 2.0 via SAML 2.0. The section is segregated into two parts: the first section is related to changes on AccessManagement 2.0’s side, and the second section is related to changes on Okta’s side. As a pre-requisite, please have the SAML 2.0 IDP created. To create an OKTA SAML2.0 IDP, please follow the steps mentioned here if needed.
Section 1: Changes on AccessManagement 2.0’s side
Step 1
AccessManagement 2.0 needs to understand how to handle SAML assertions from Okta, which is accomplished by exporting and importing the correct metadata and establishing a Client. Log in to the admin console. Go to your already created IDP and click on the SAML 2.0 Service Provider Metadata link. Copy and save the contents from the metadata link in a .xml file.
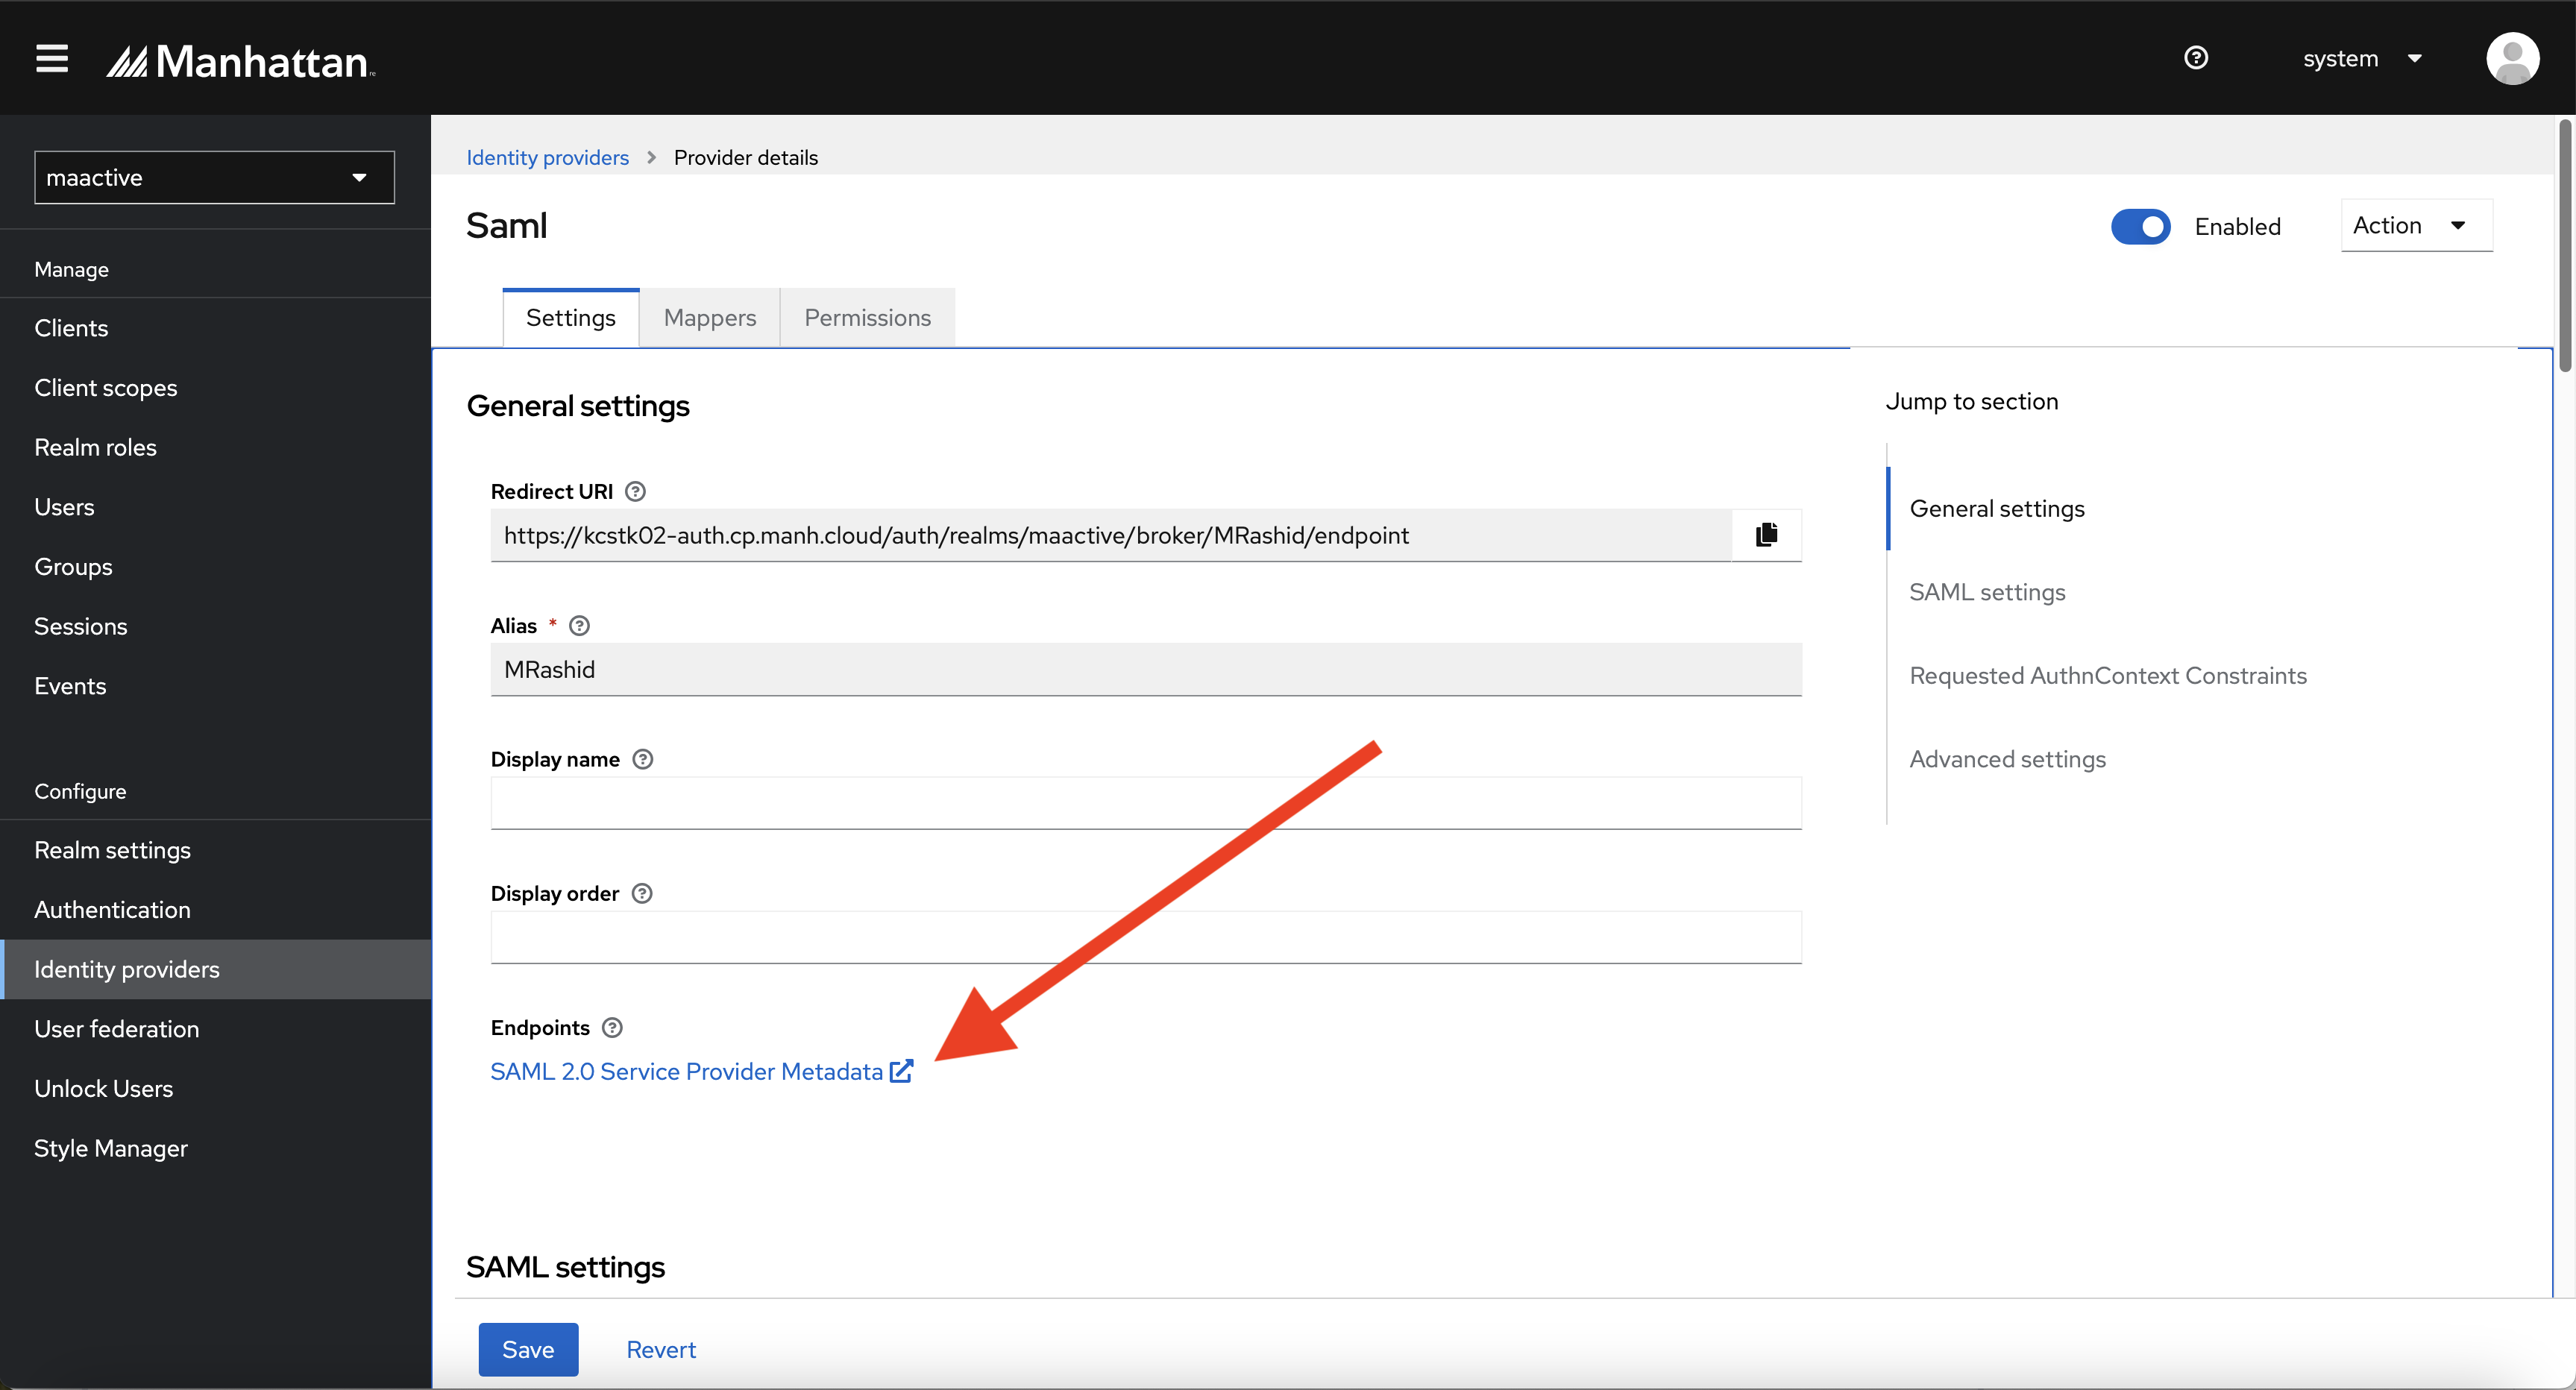
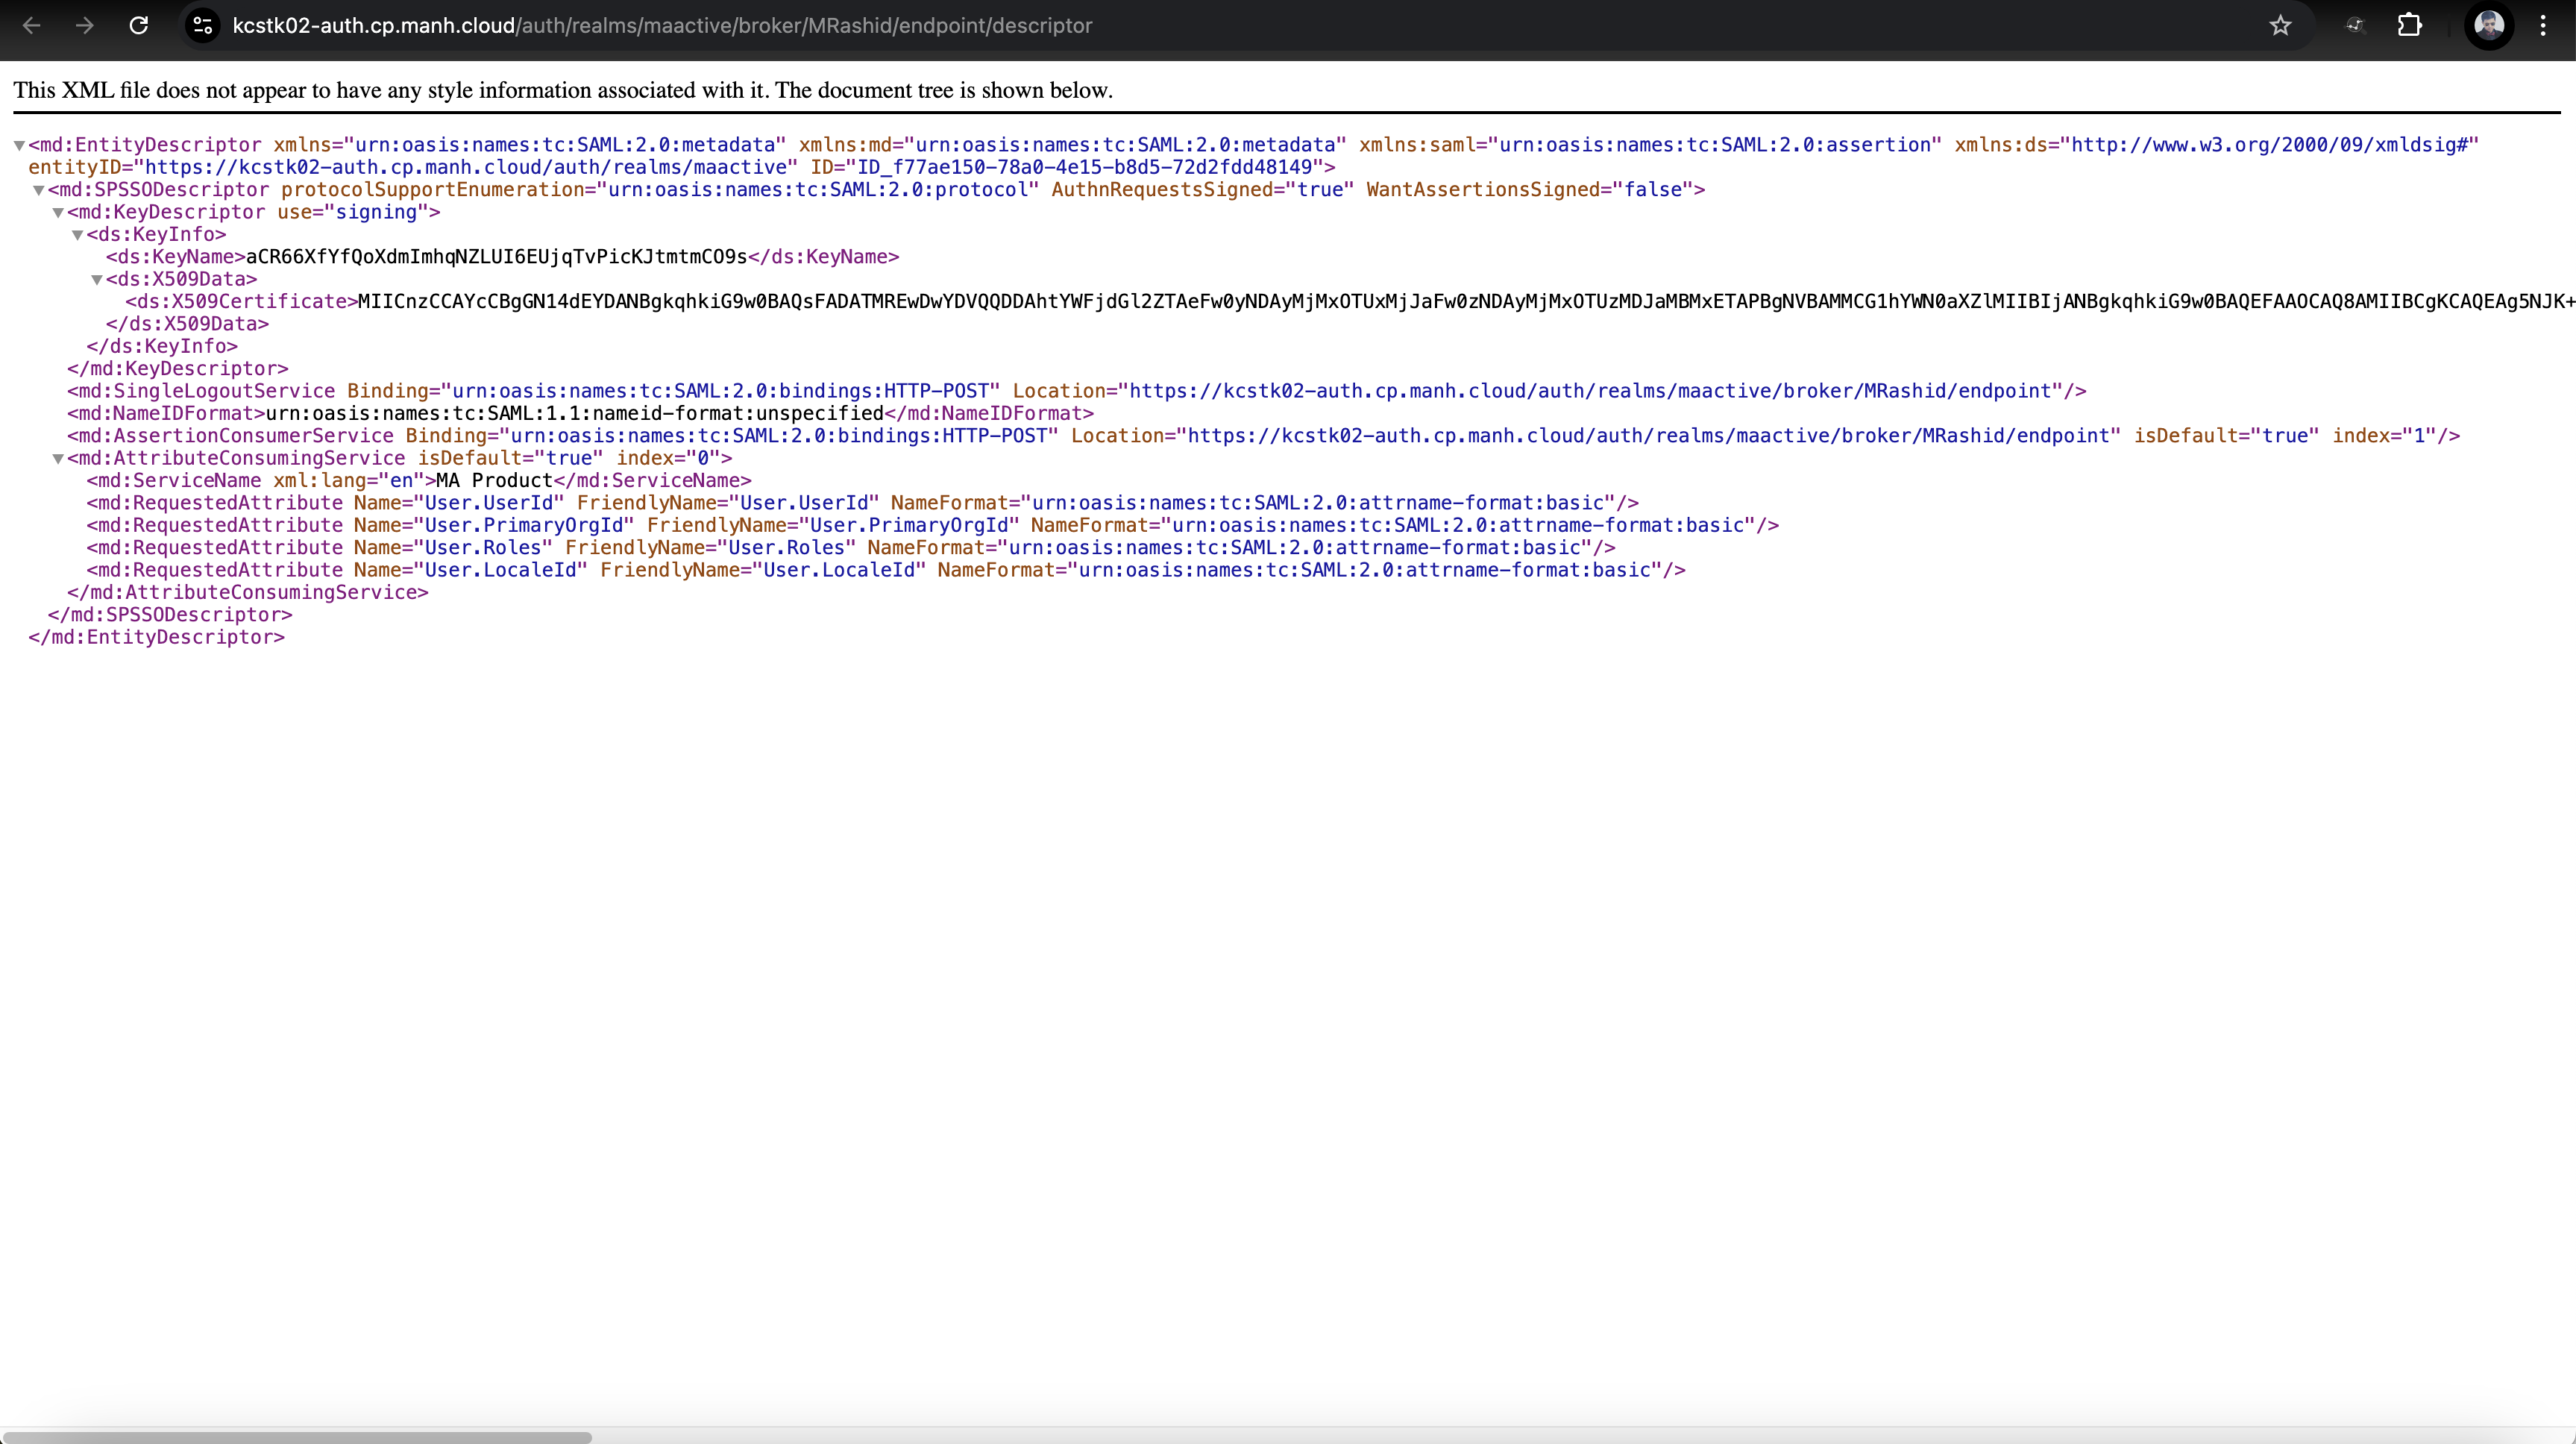
Figure: Sample content of SAML 2.0 service provider metadata
Step 2
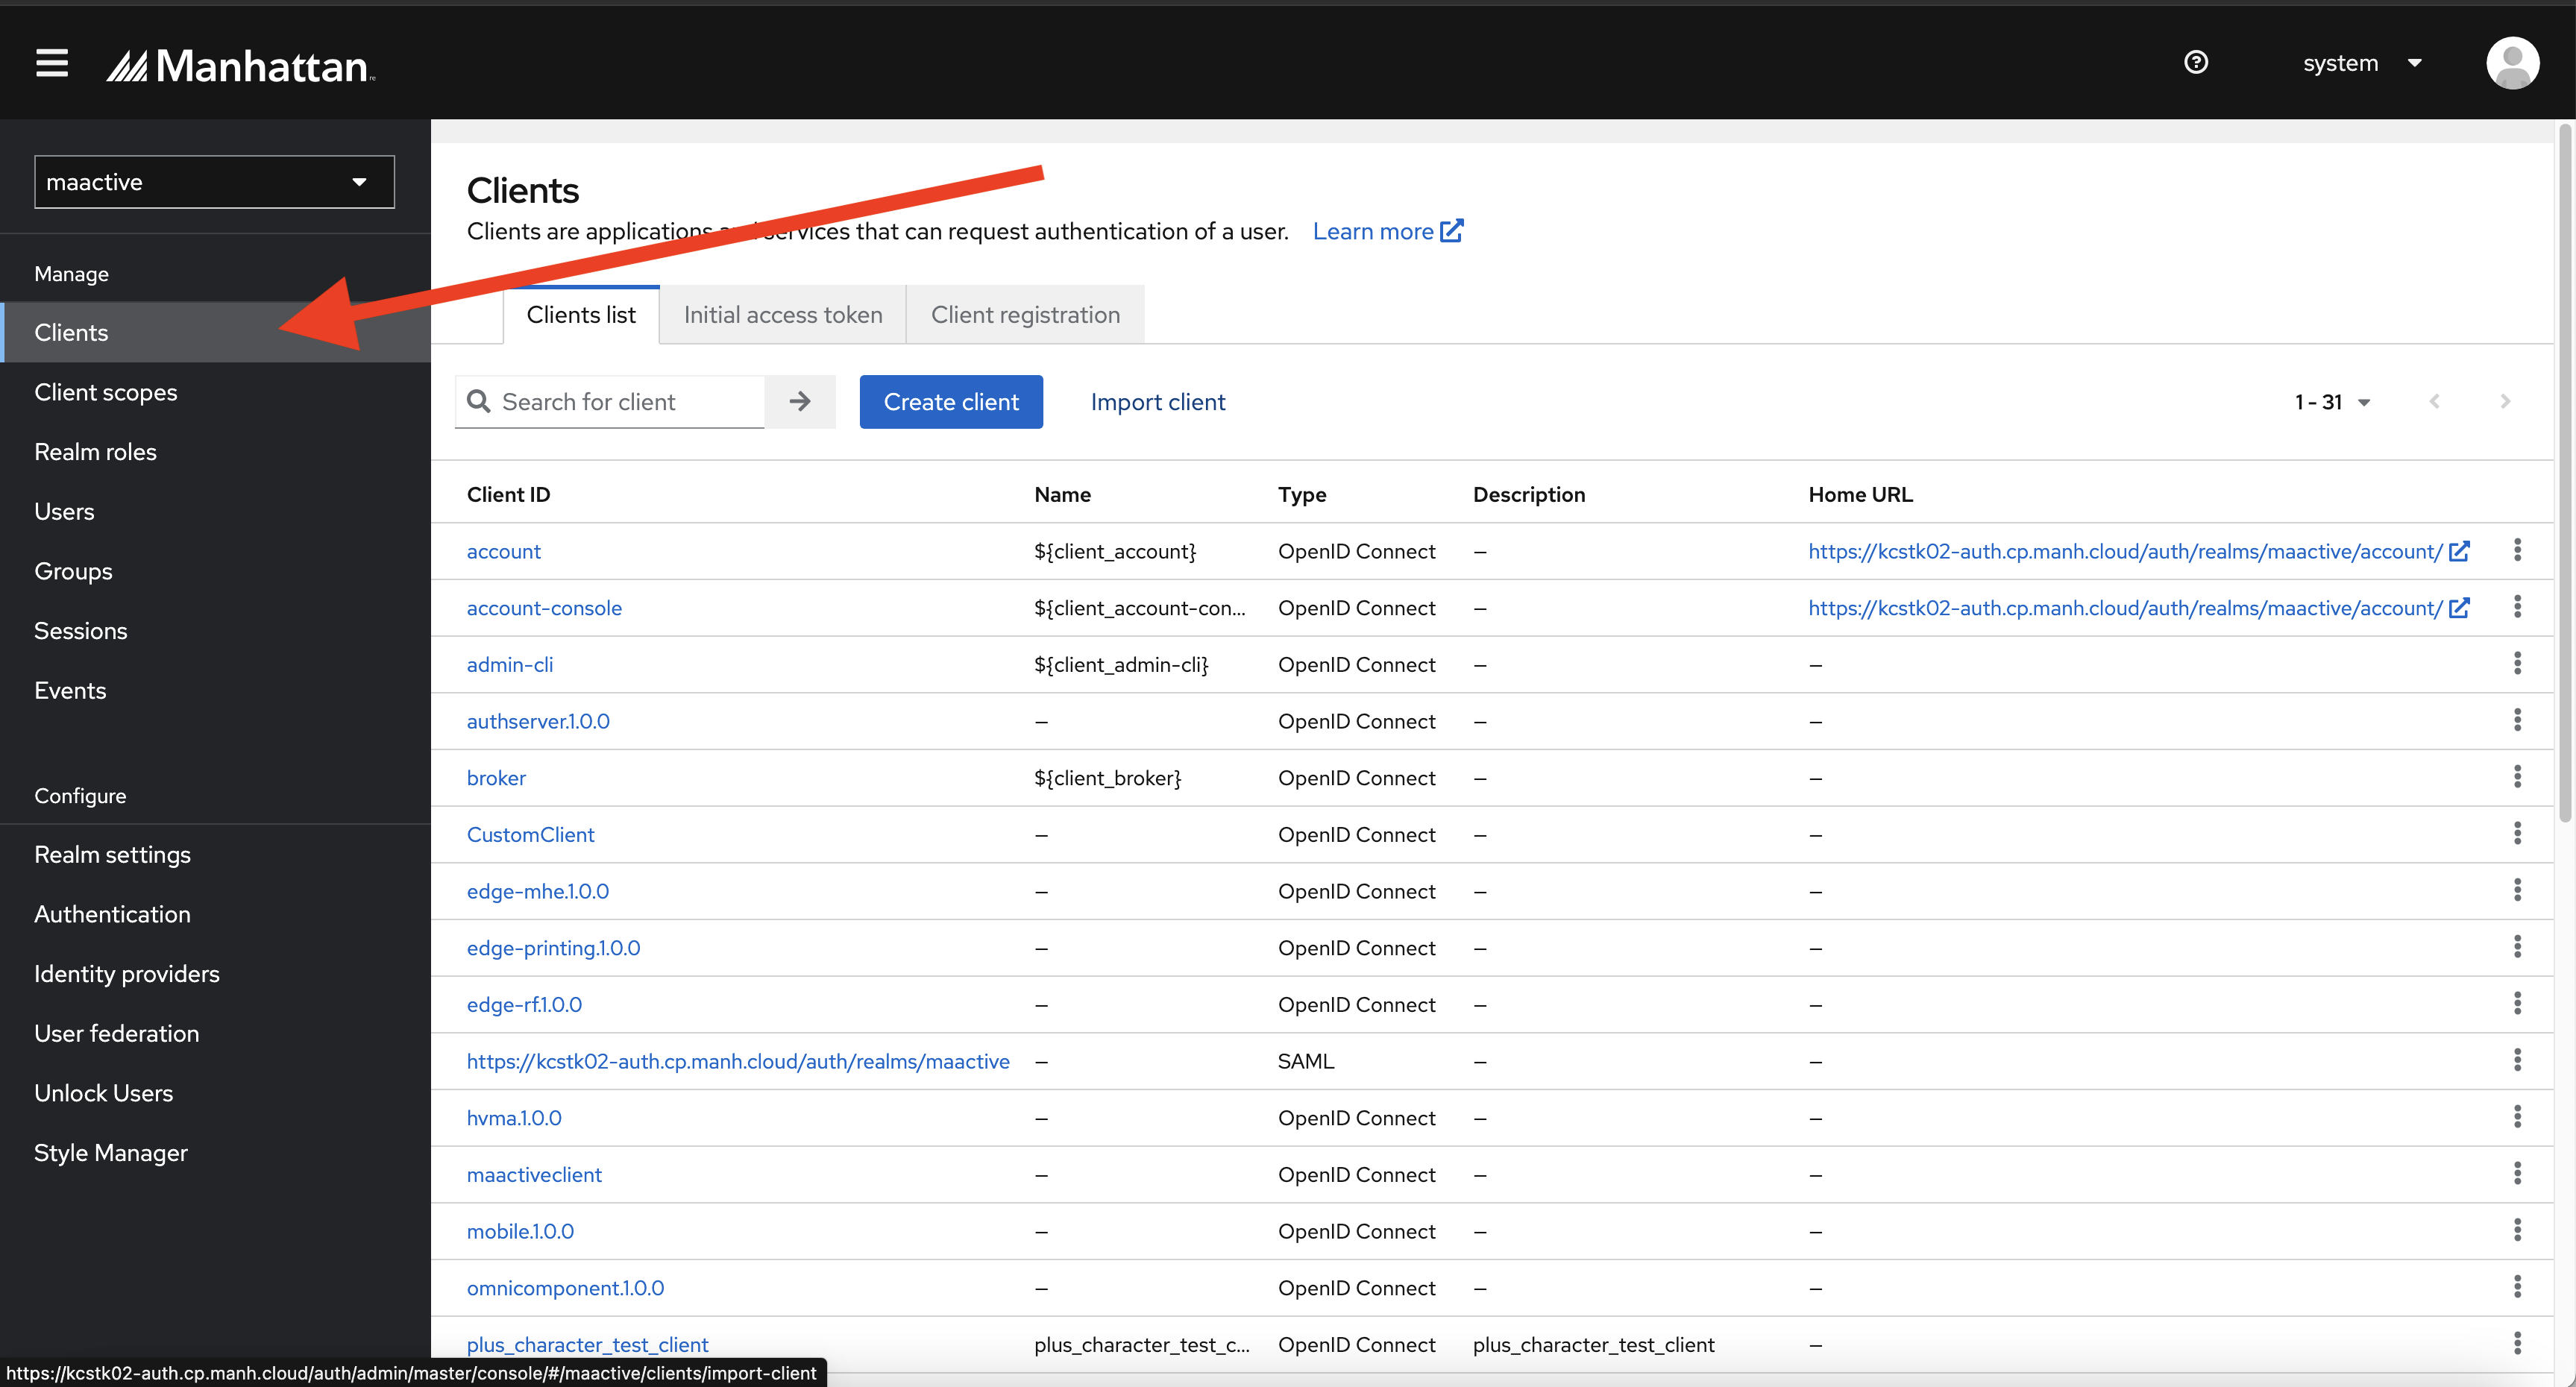
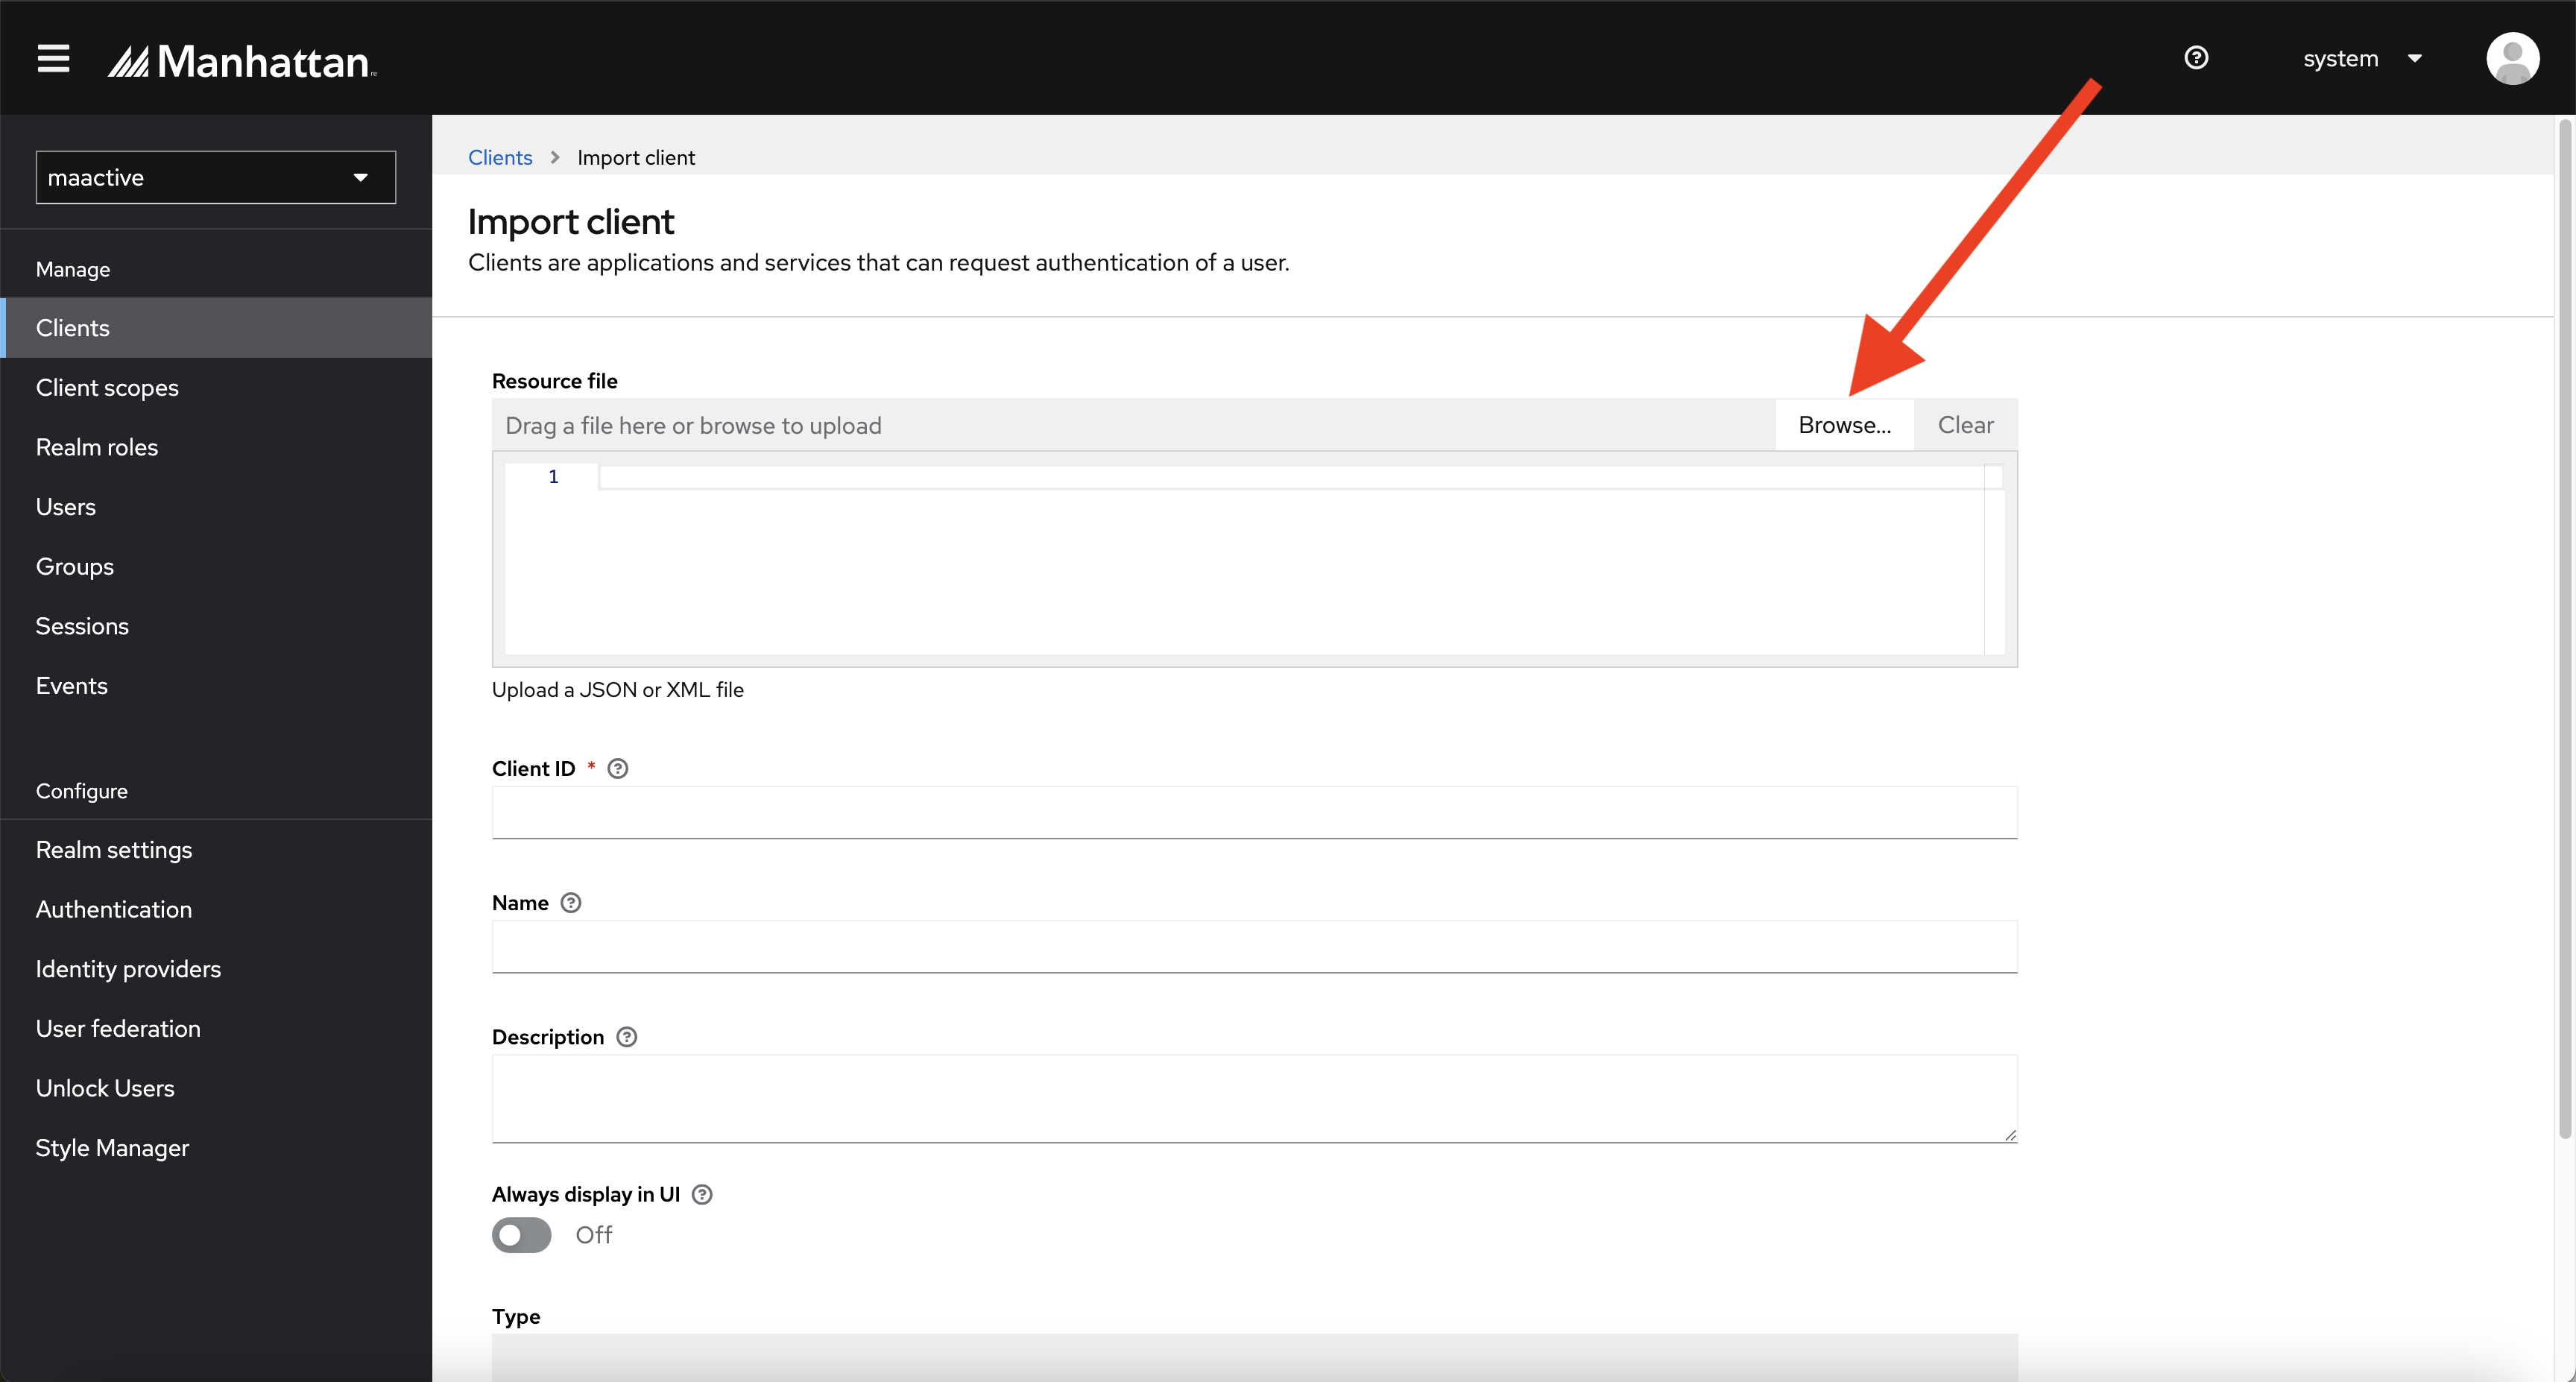
Go to the Clients section of the maactive realm and click Import client. On the next page, click Browse and import the .xml file exported in Step 1. Then, scroll down and click Save.
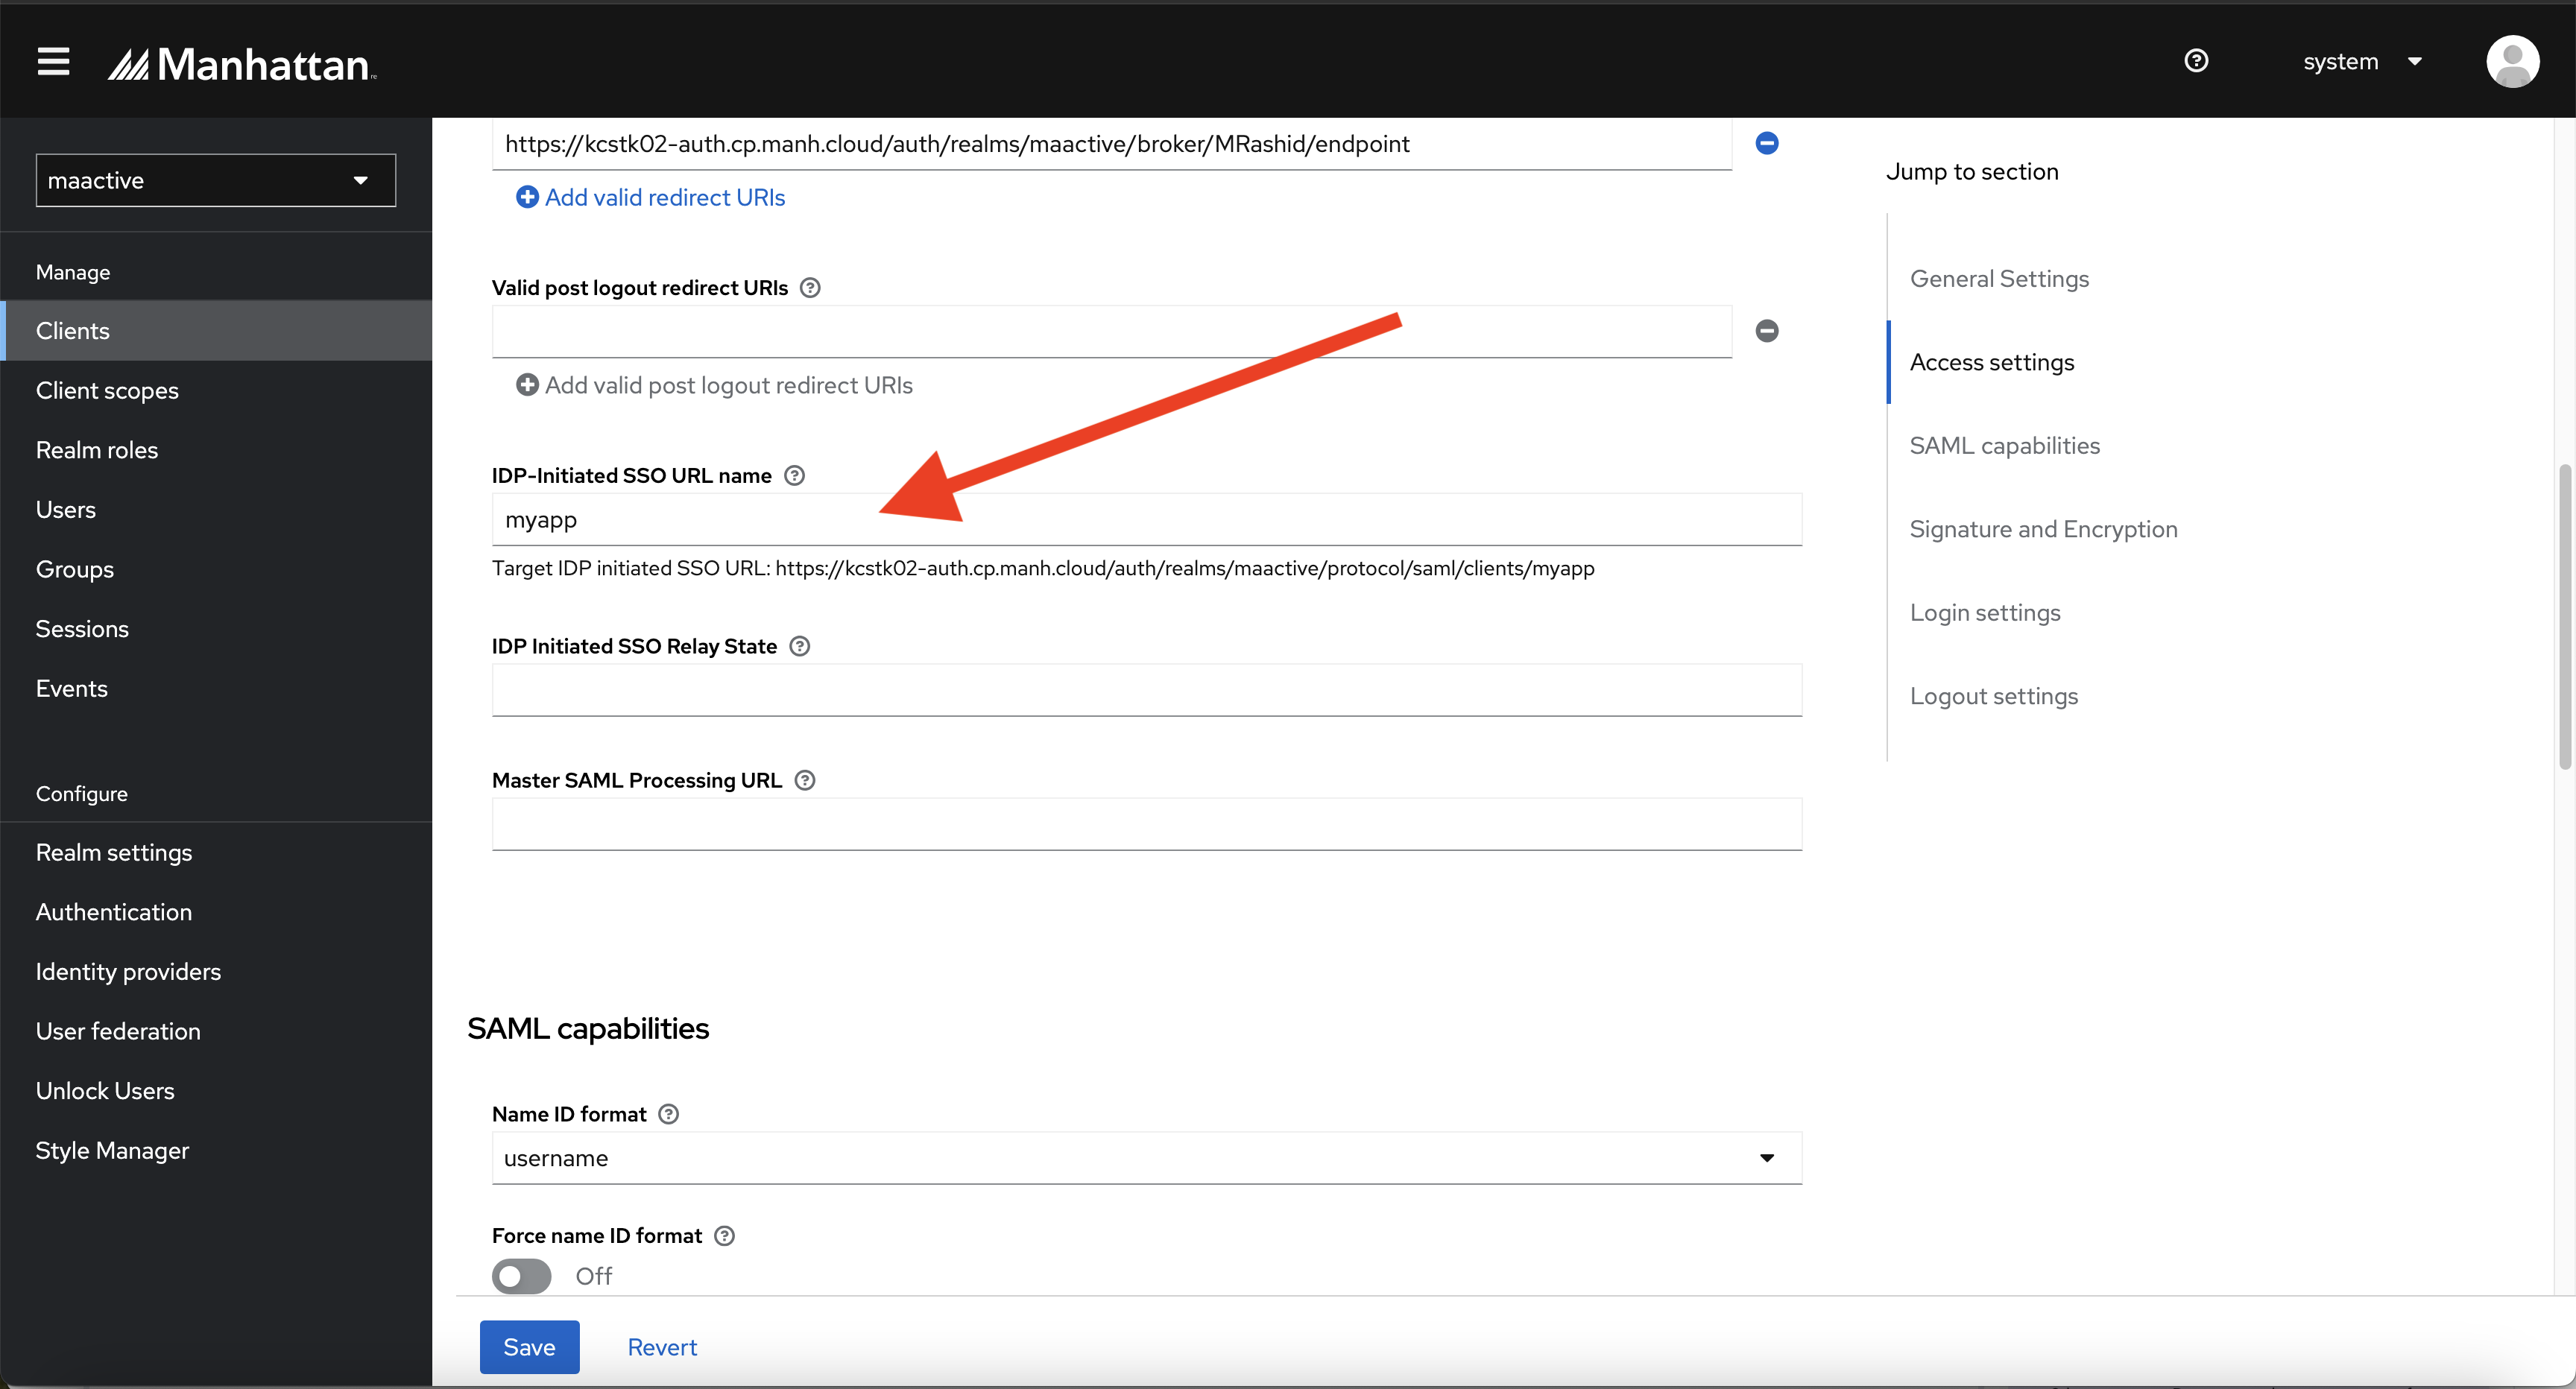
Step 3
Go to the IDP-Initiated SSO URL name on the same page and give a name to your app.
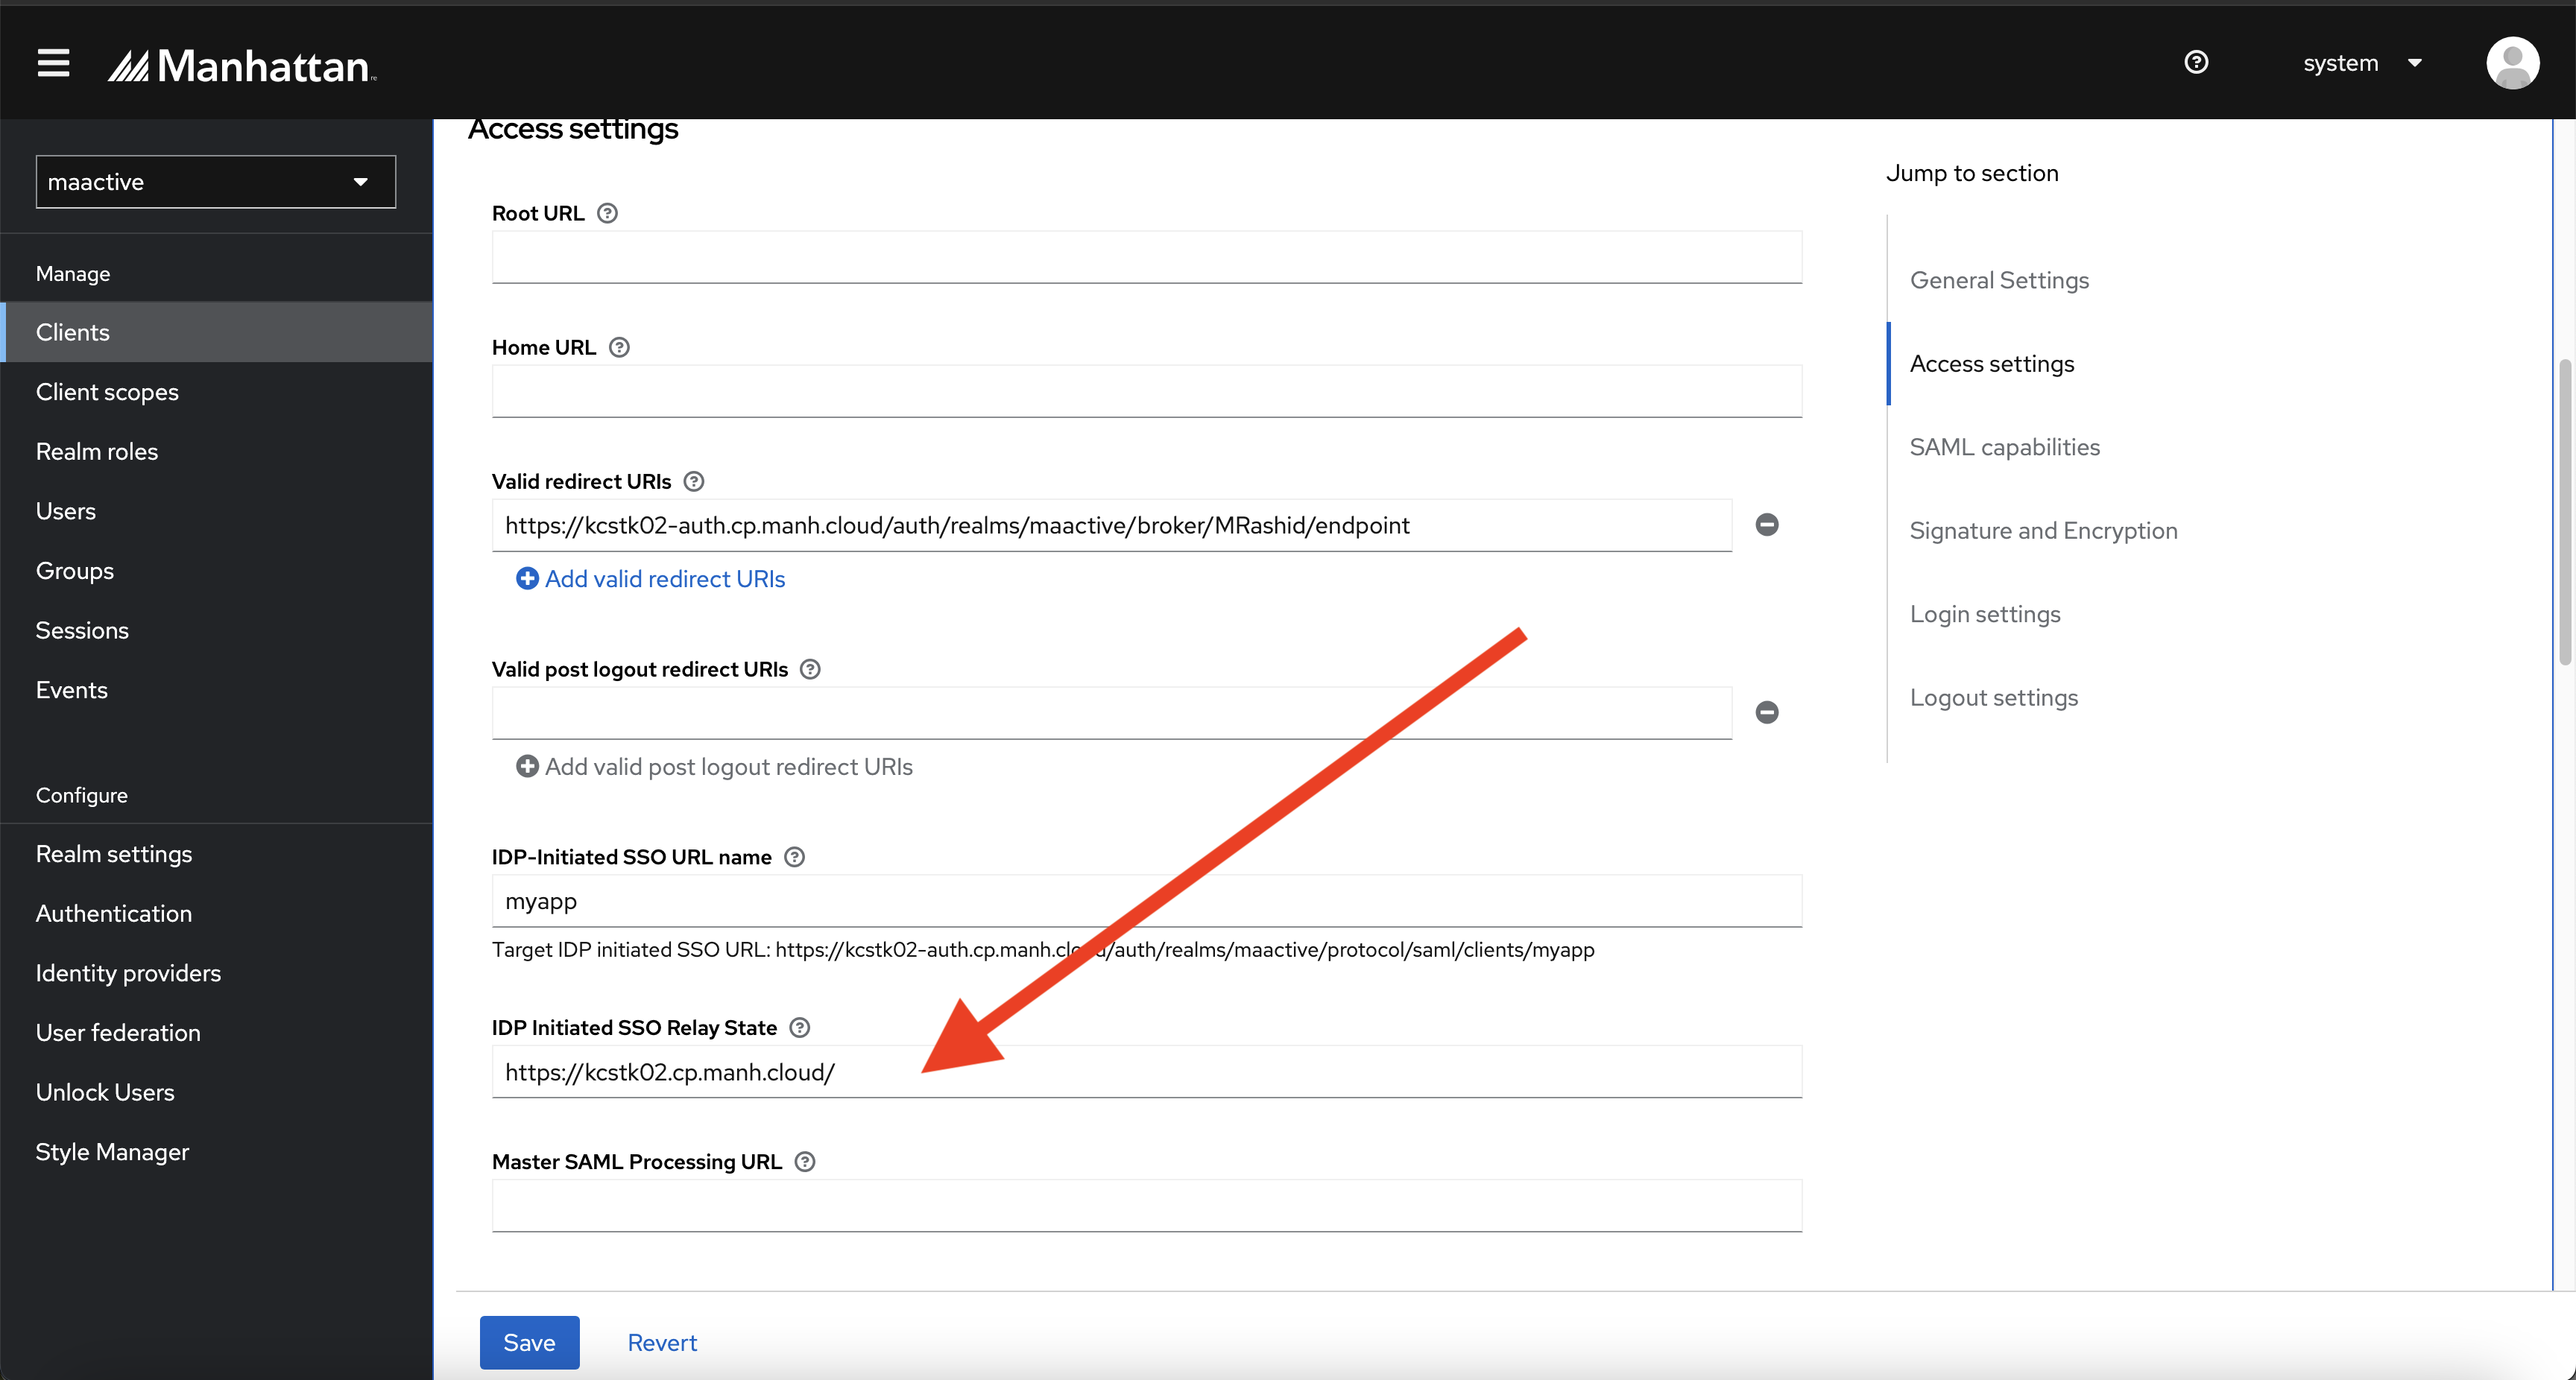
Step 4
Go to IDP Initiated SSO Relay State and enter the stack URL.
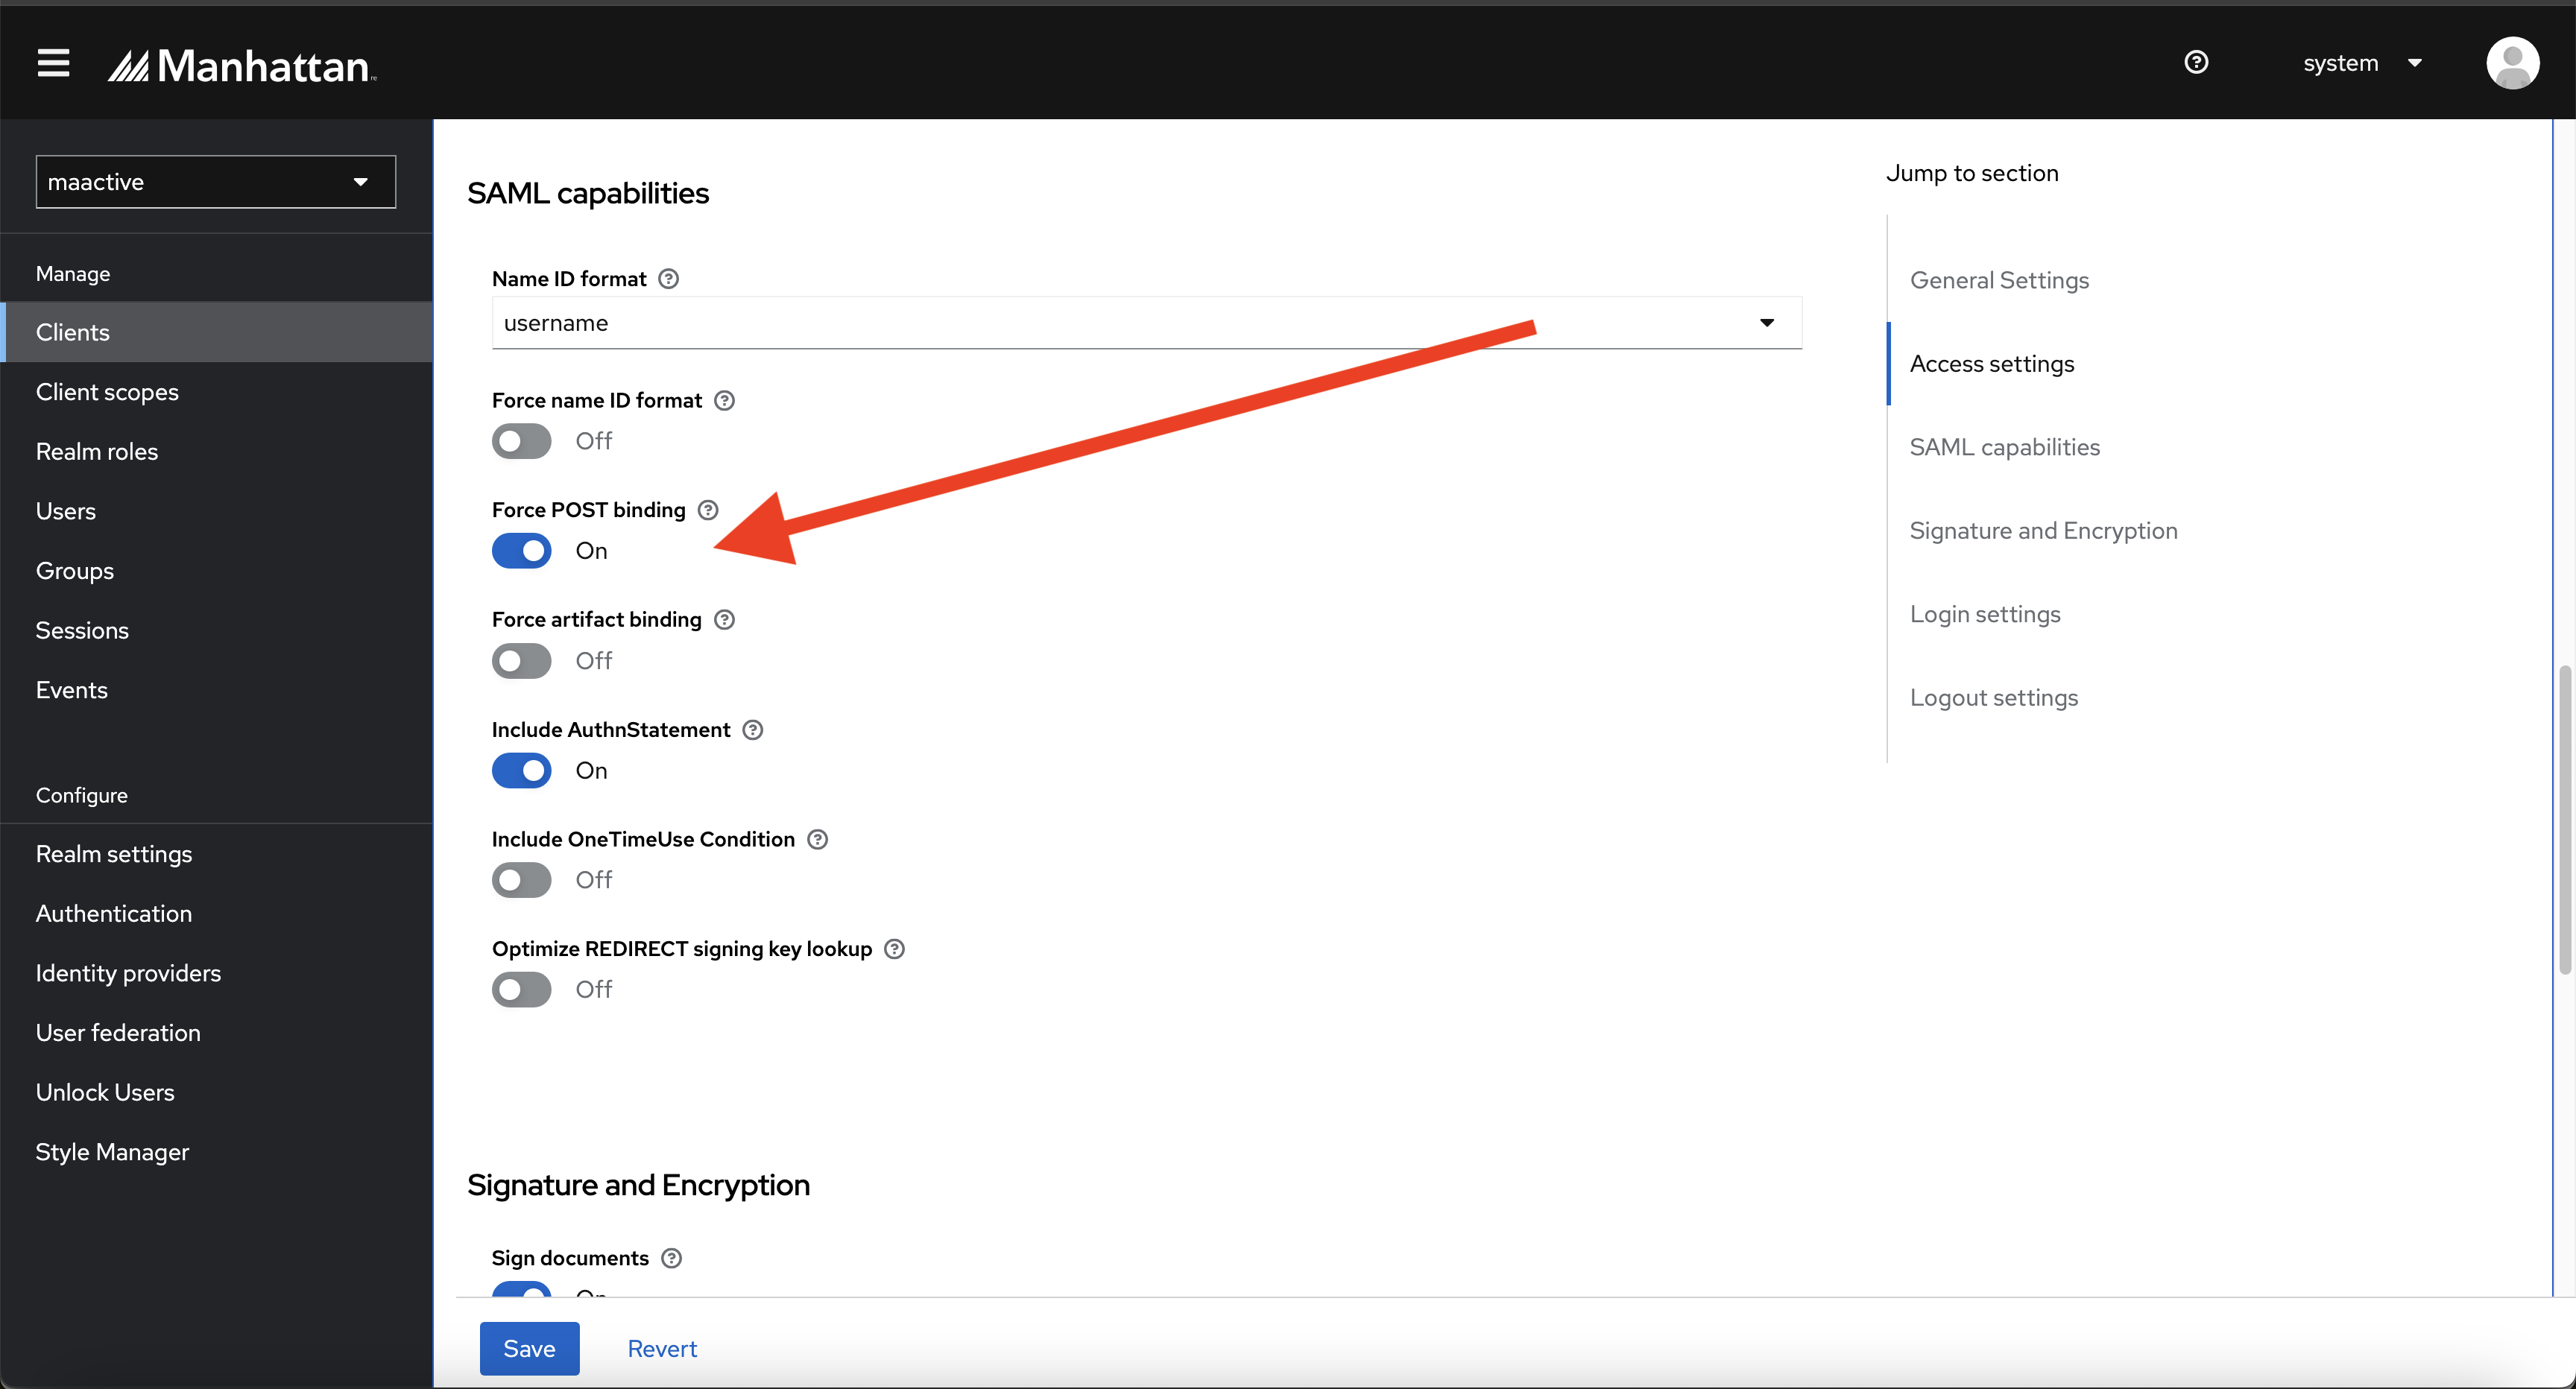
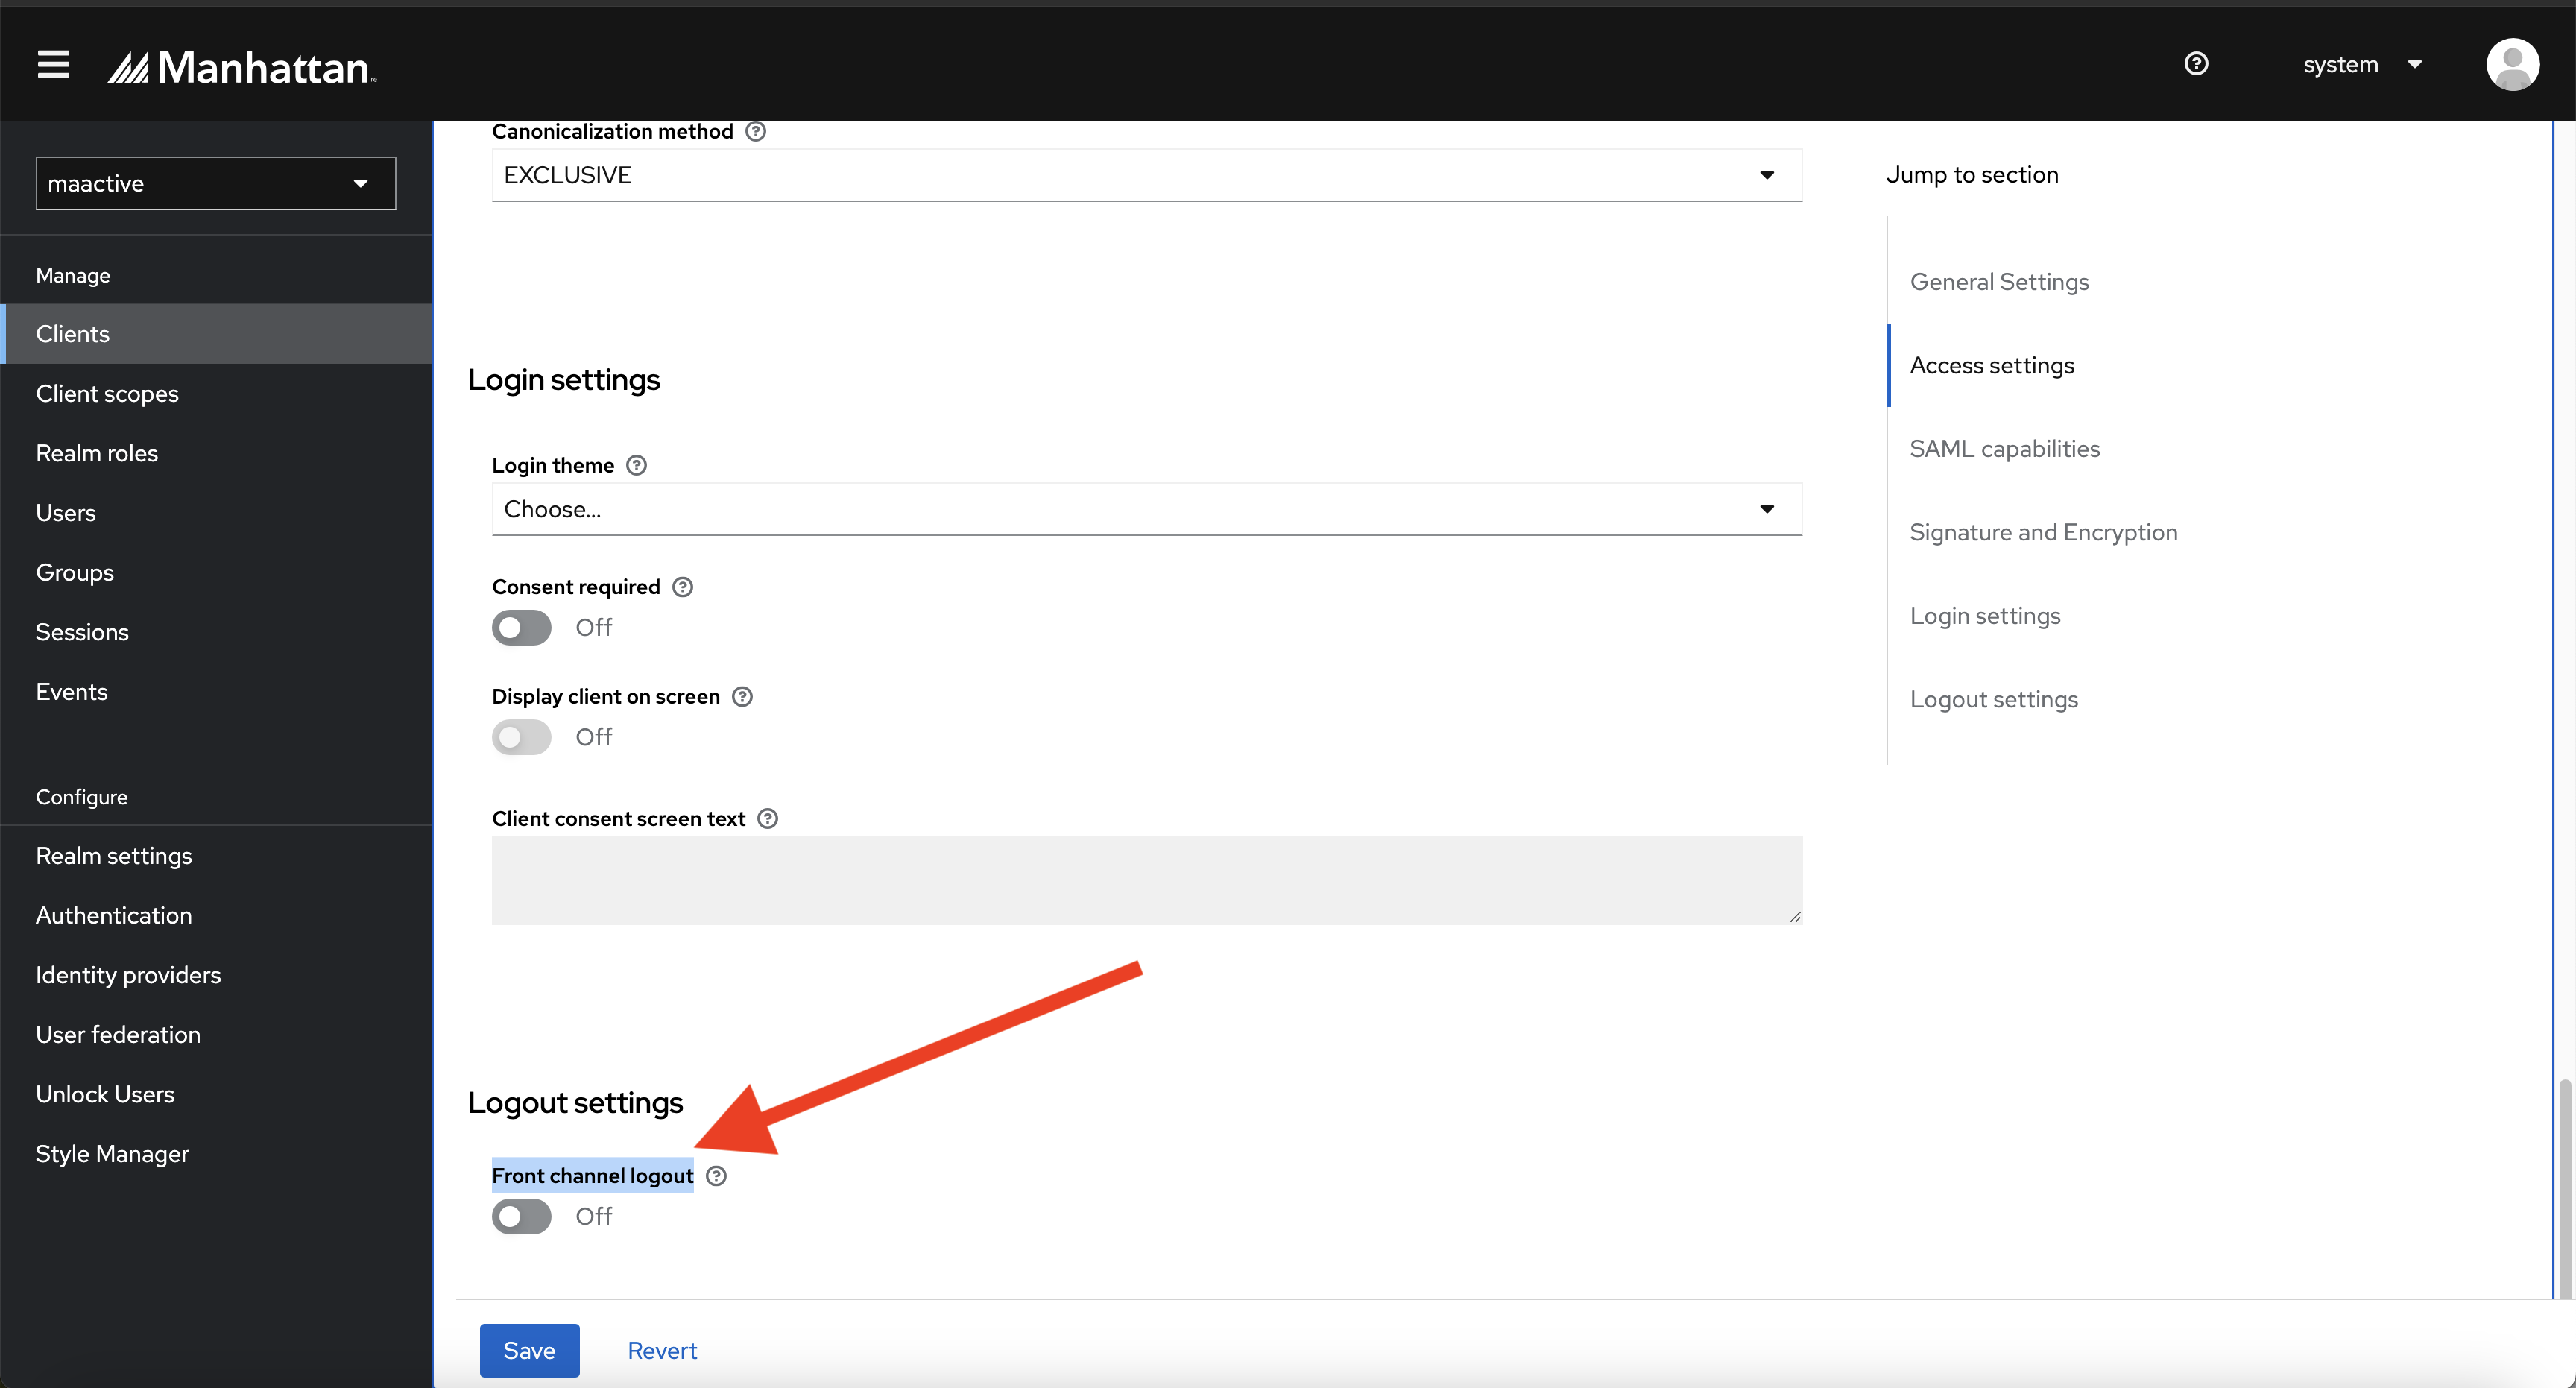
Step 5
Ensure that Force POST binding is On. Scroll down and disable Front channel logout. Once done, click Save.
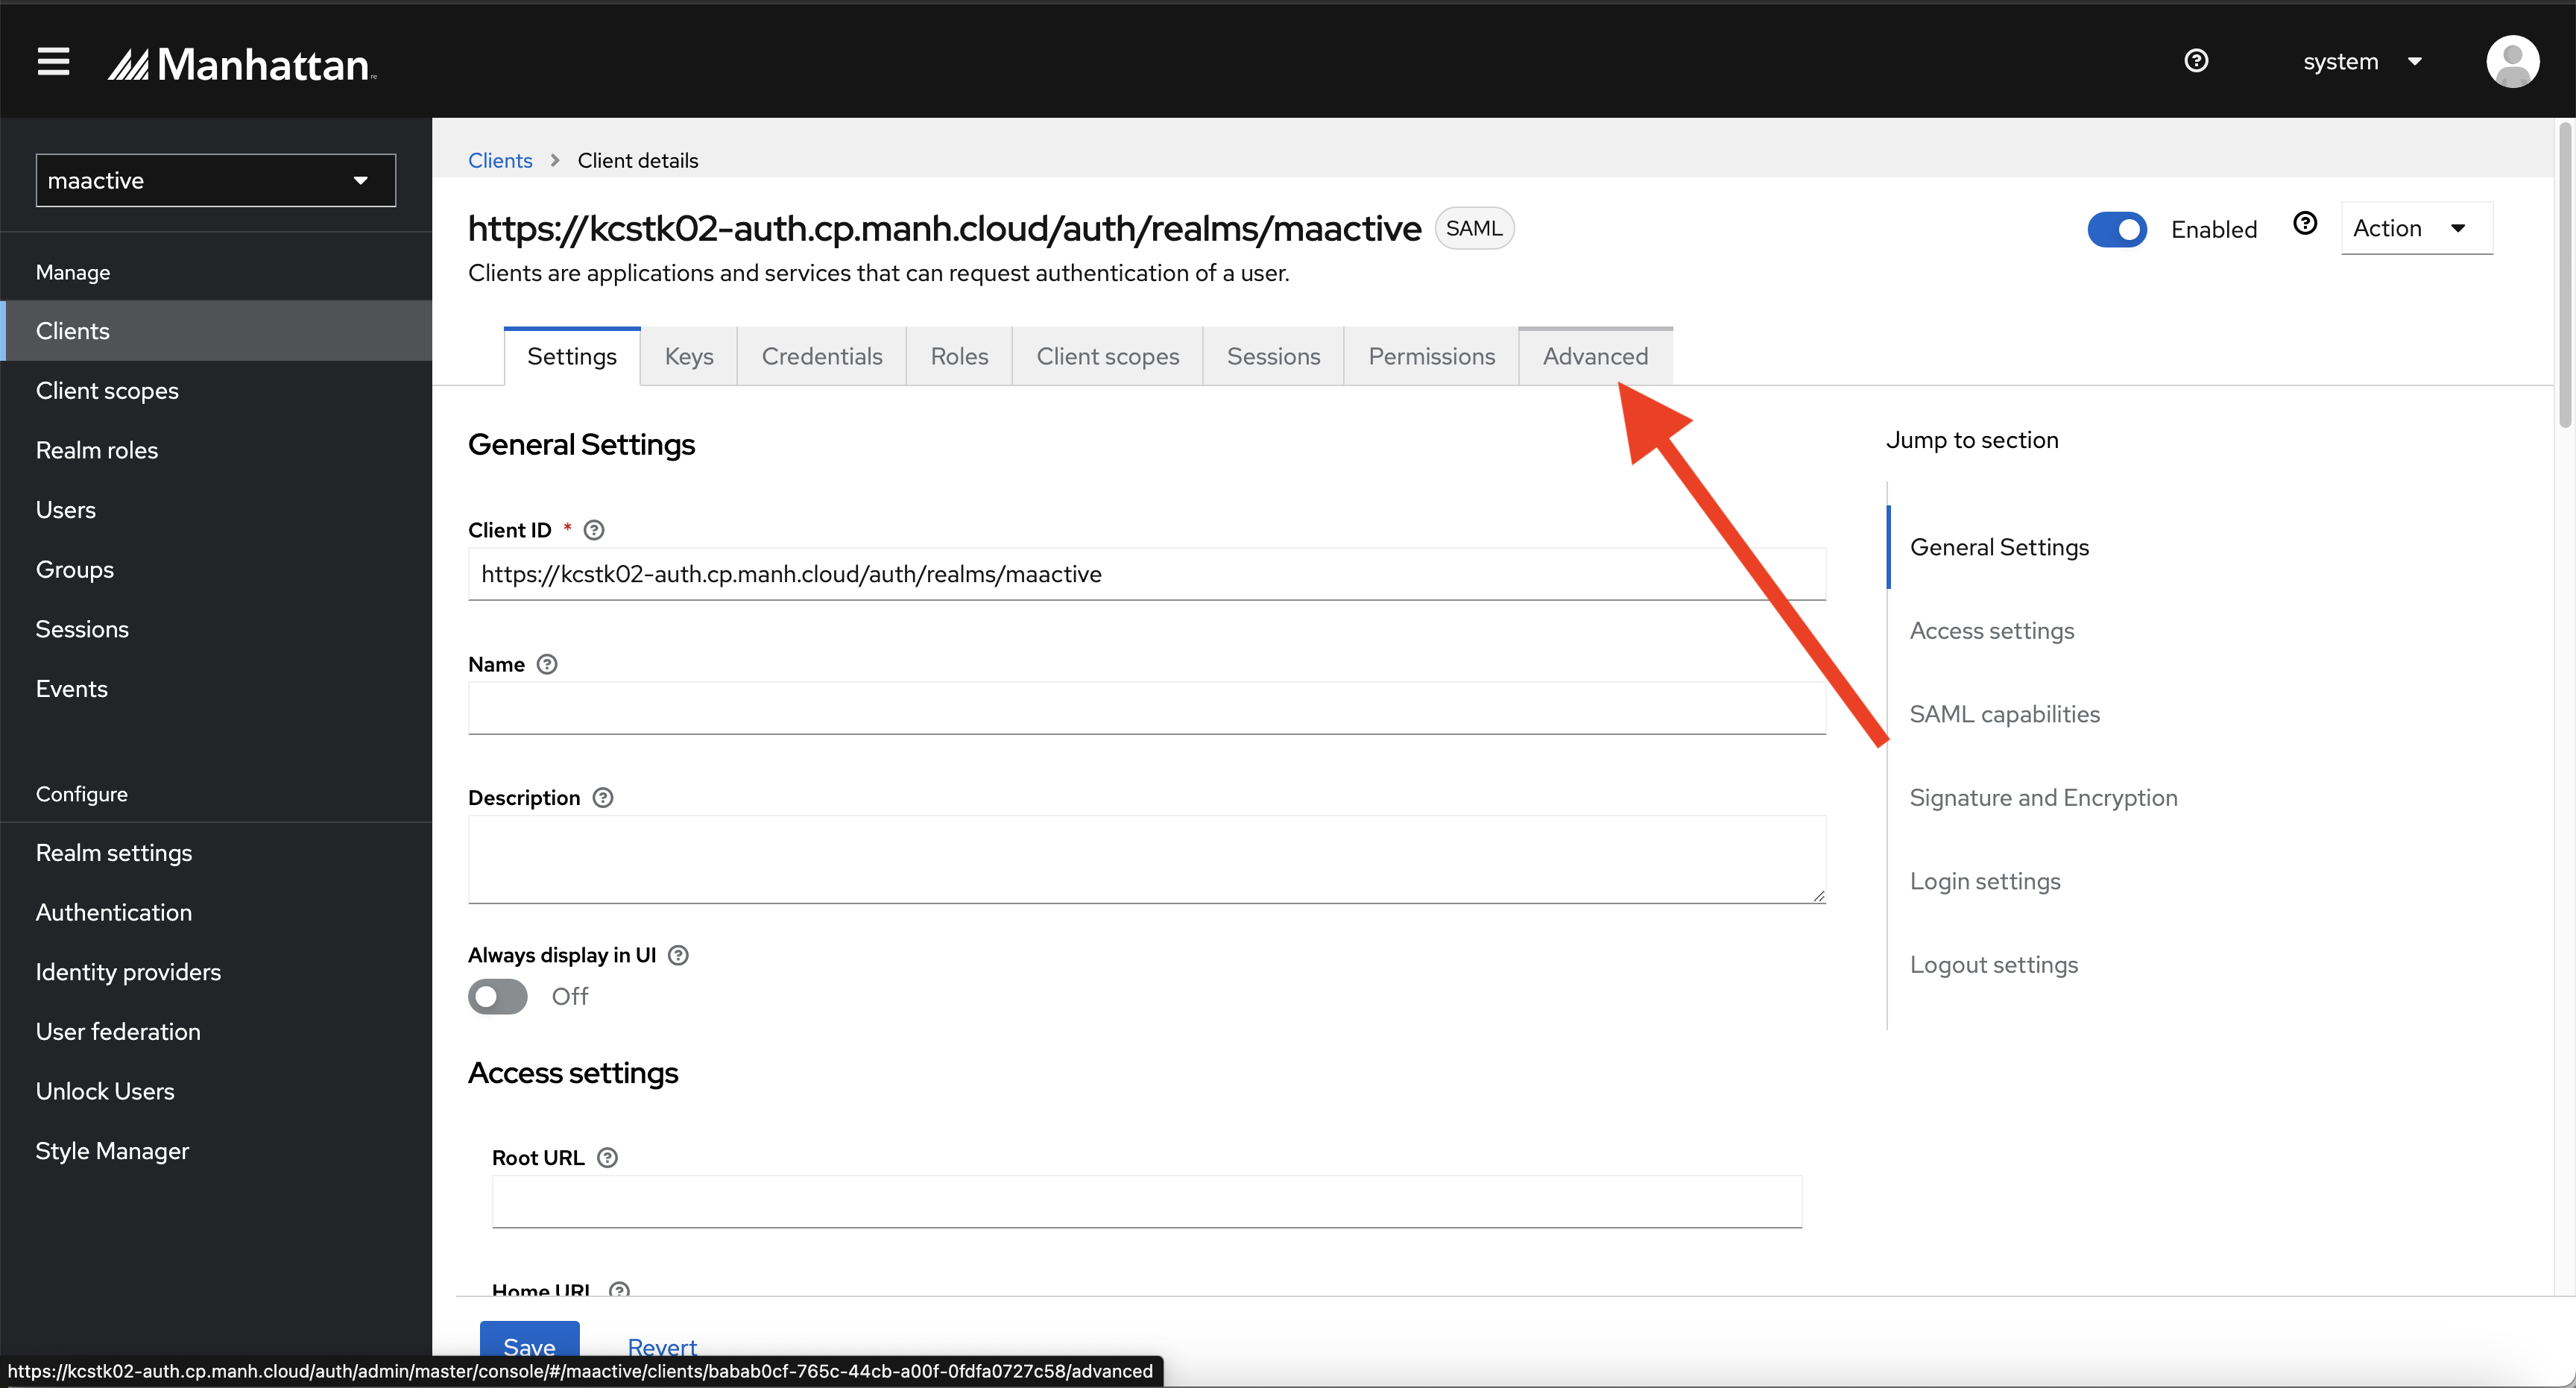
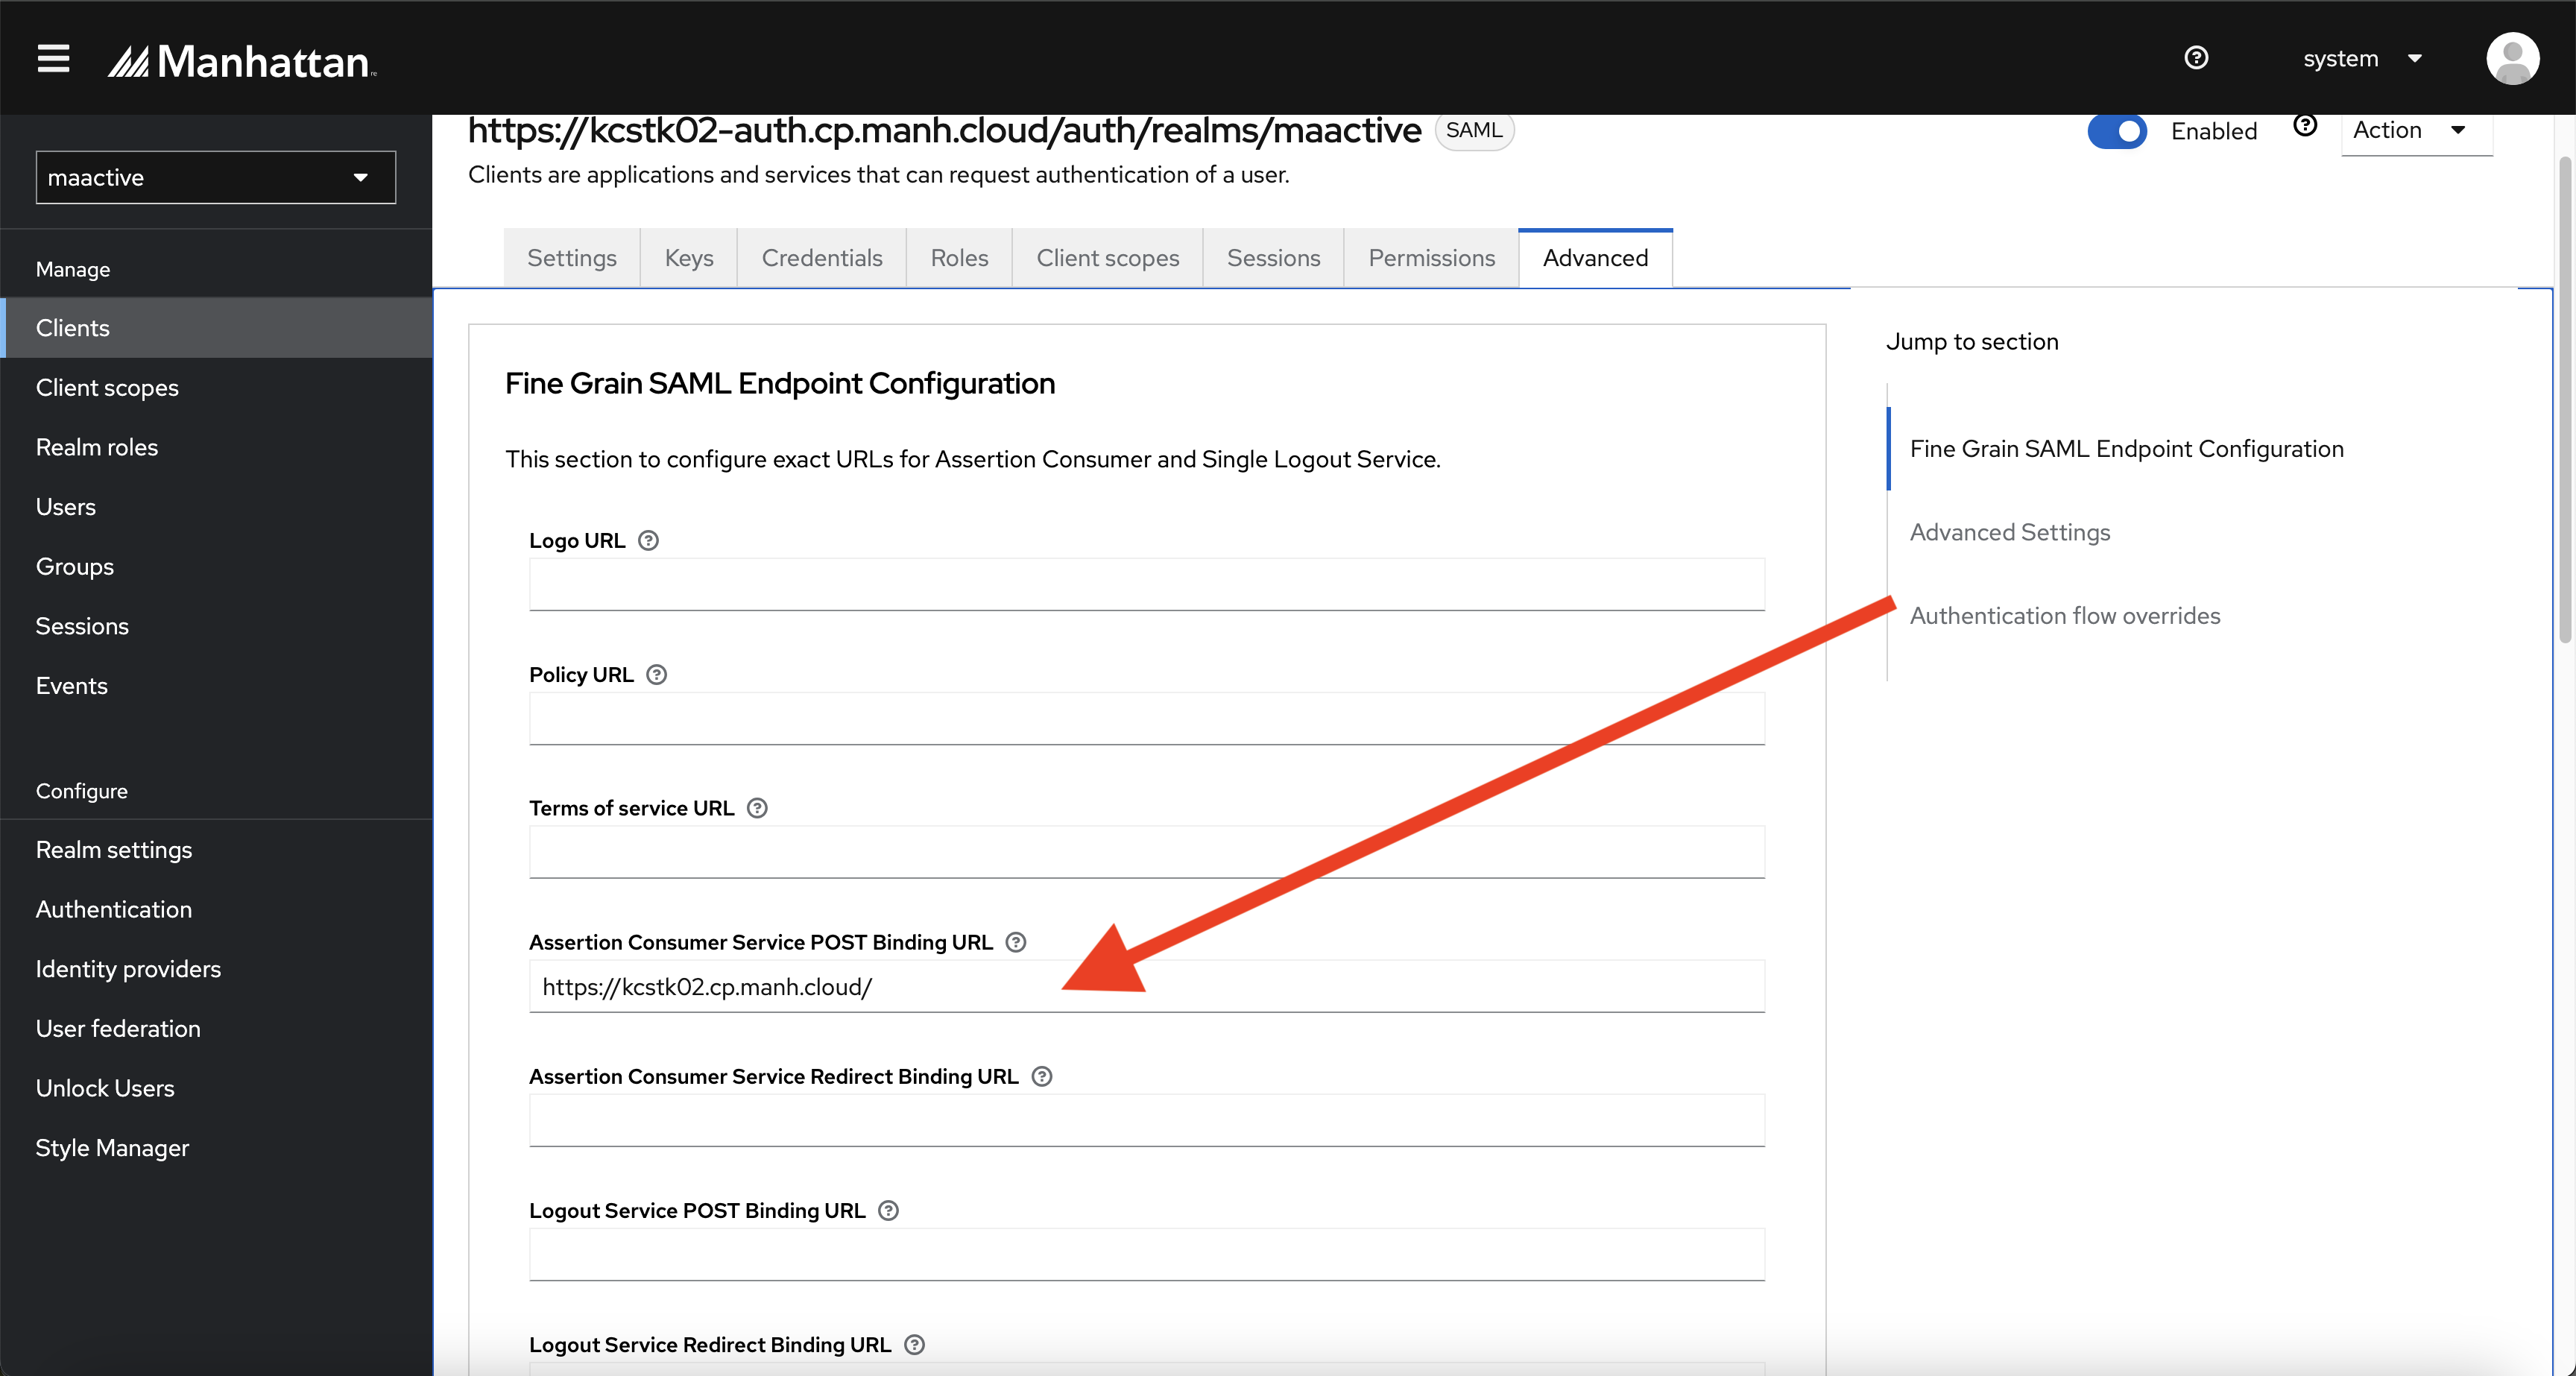
Step 6
Scroll to the top and click the Advanced section. Scroll down and add the stack URL in the Assertion Consumer Service POST Binding URL.
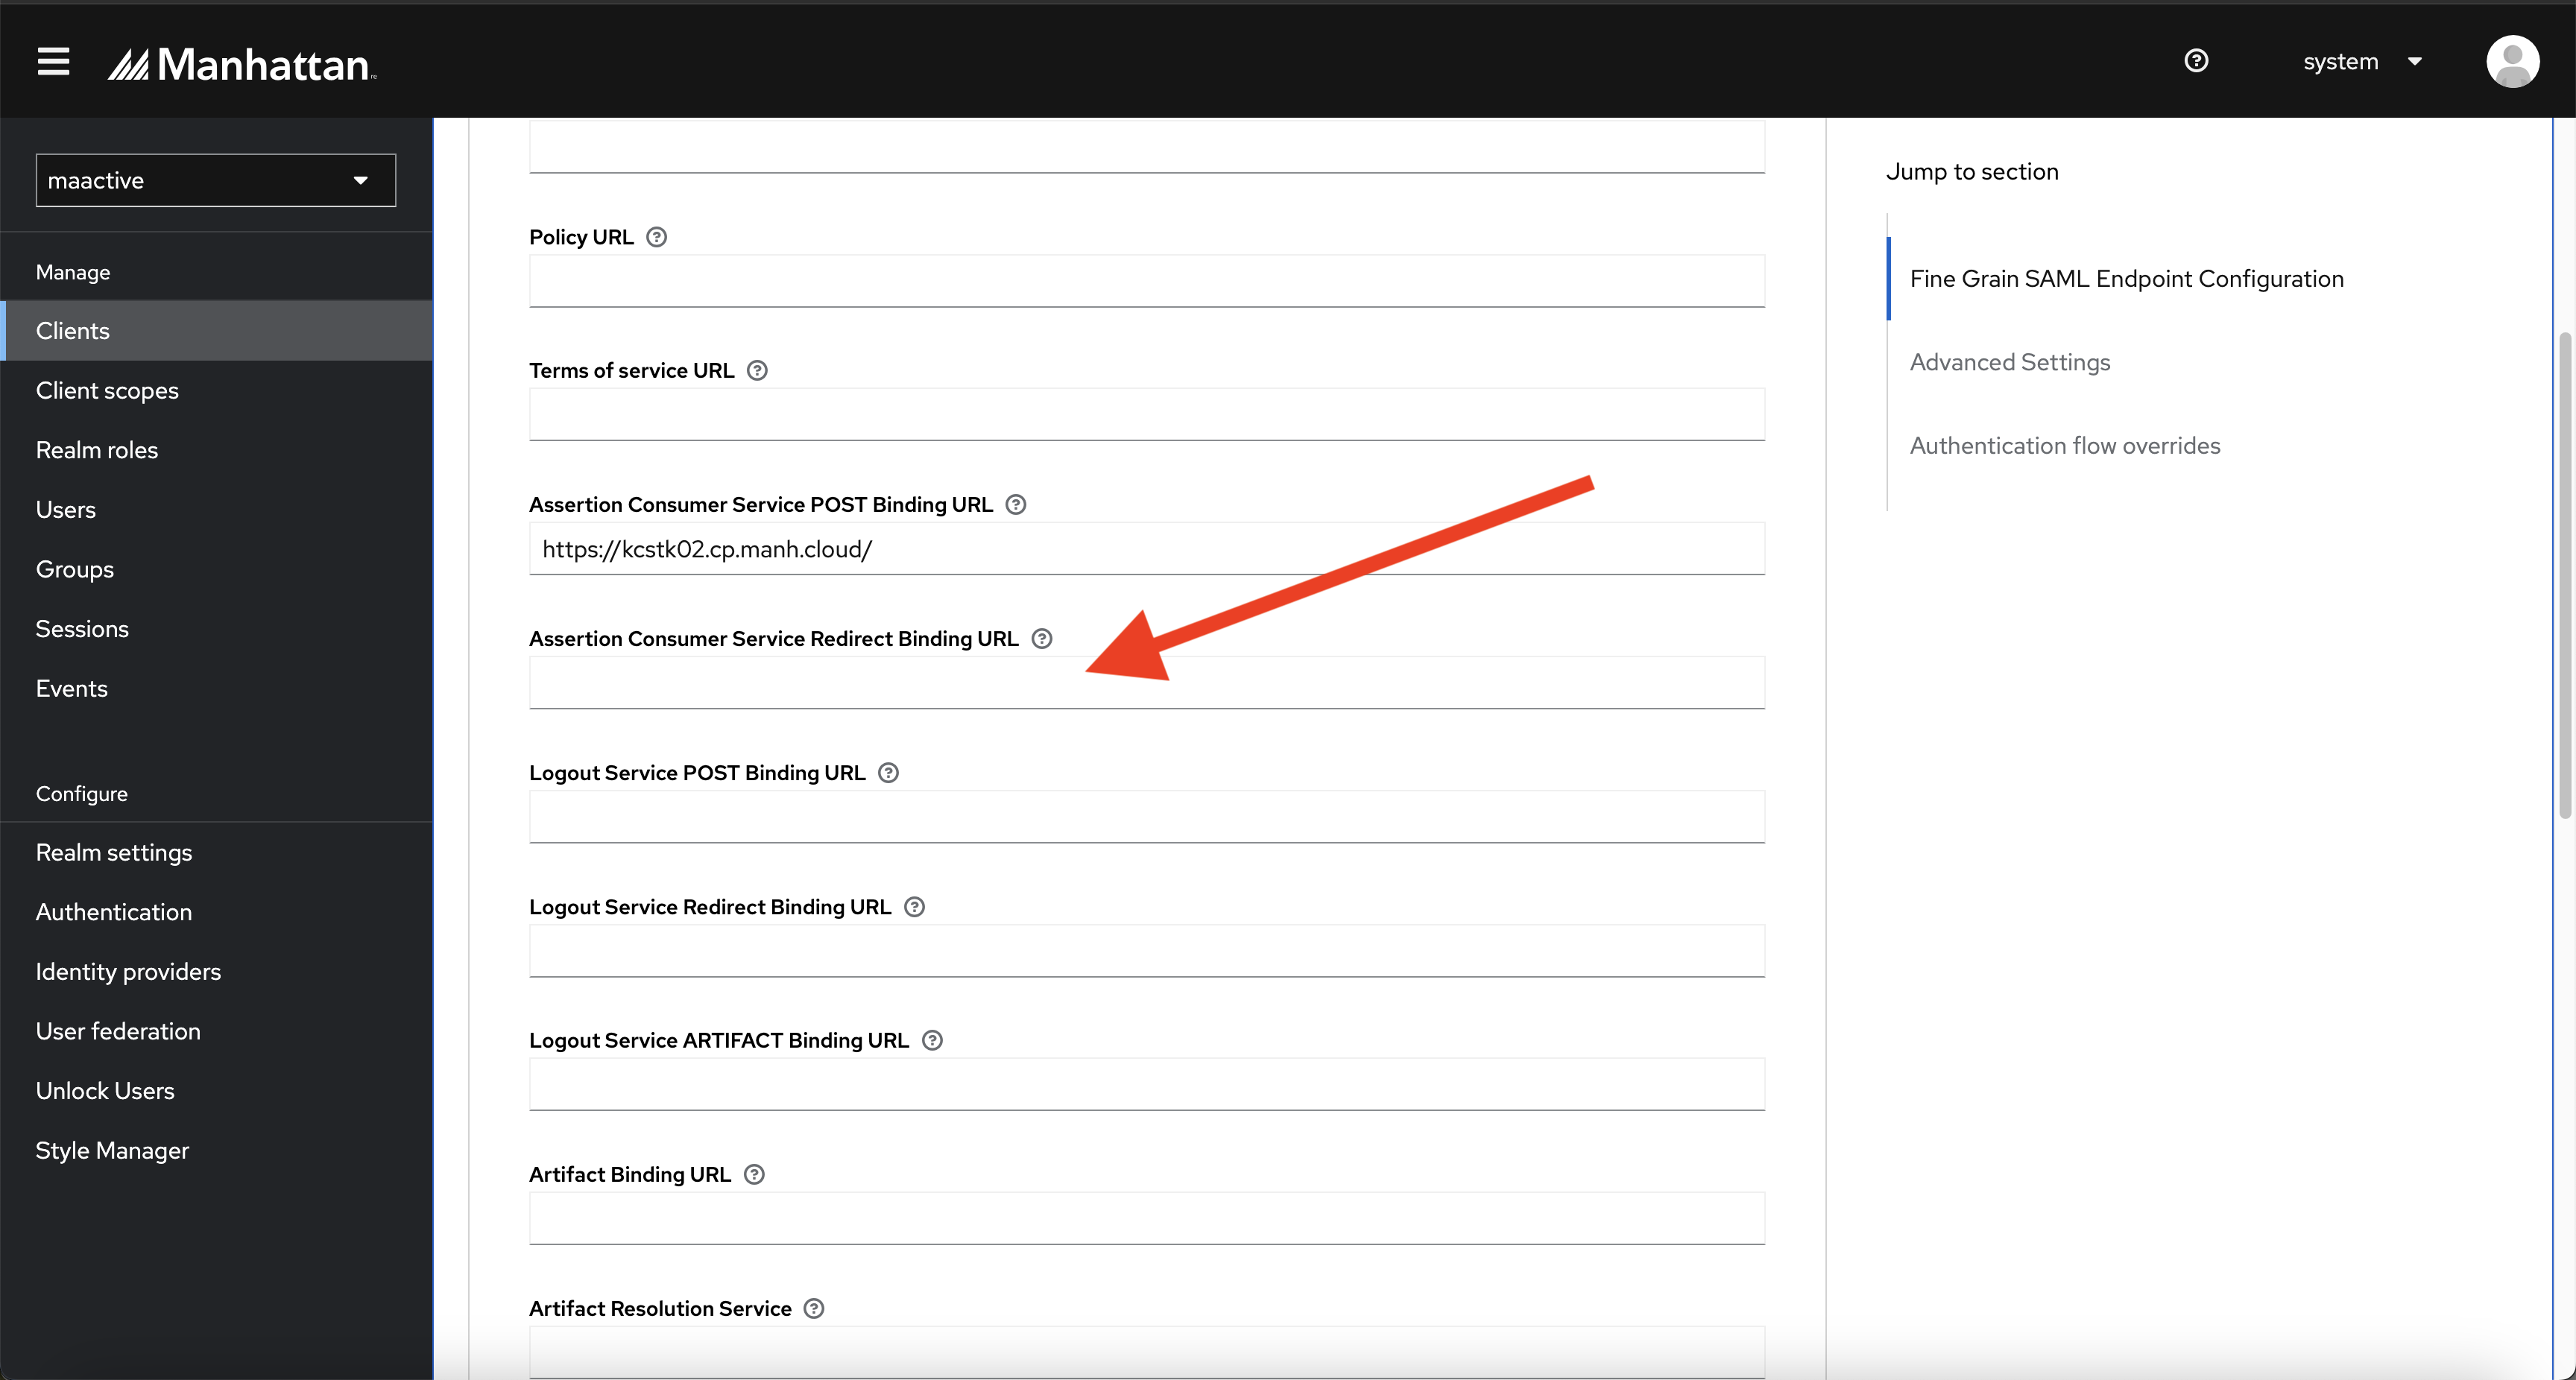
Step 7
Remove content from Assertion Consumer Service Redirect Binding URL
Step 8
Remove the content of the Logout Service POST Binding URL.

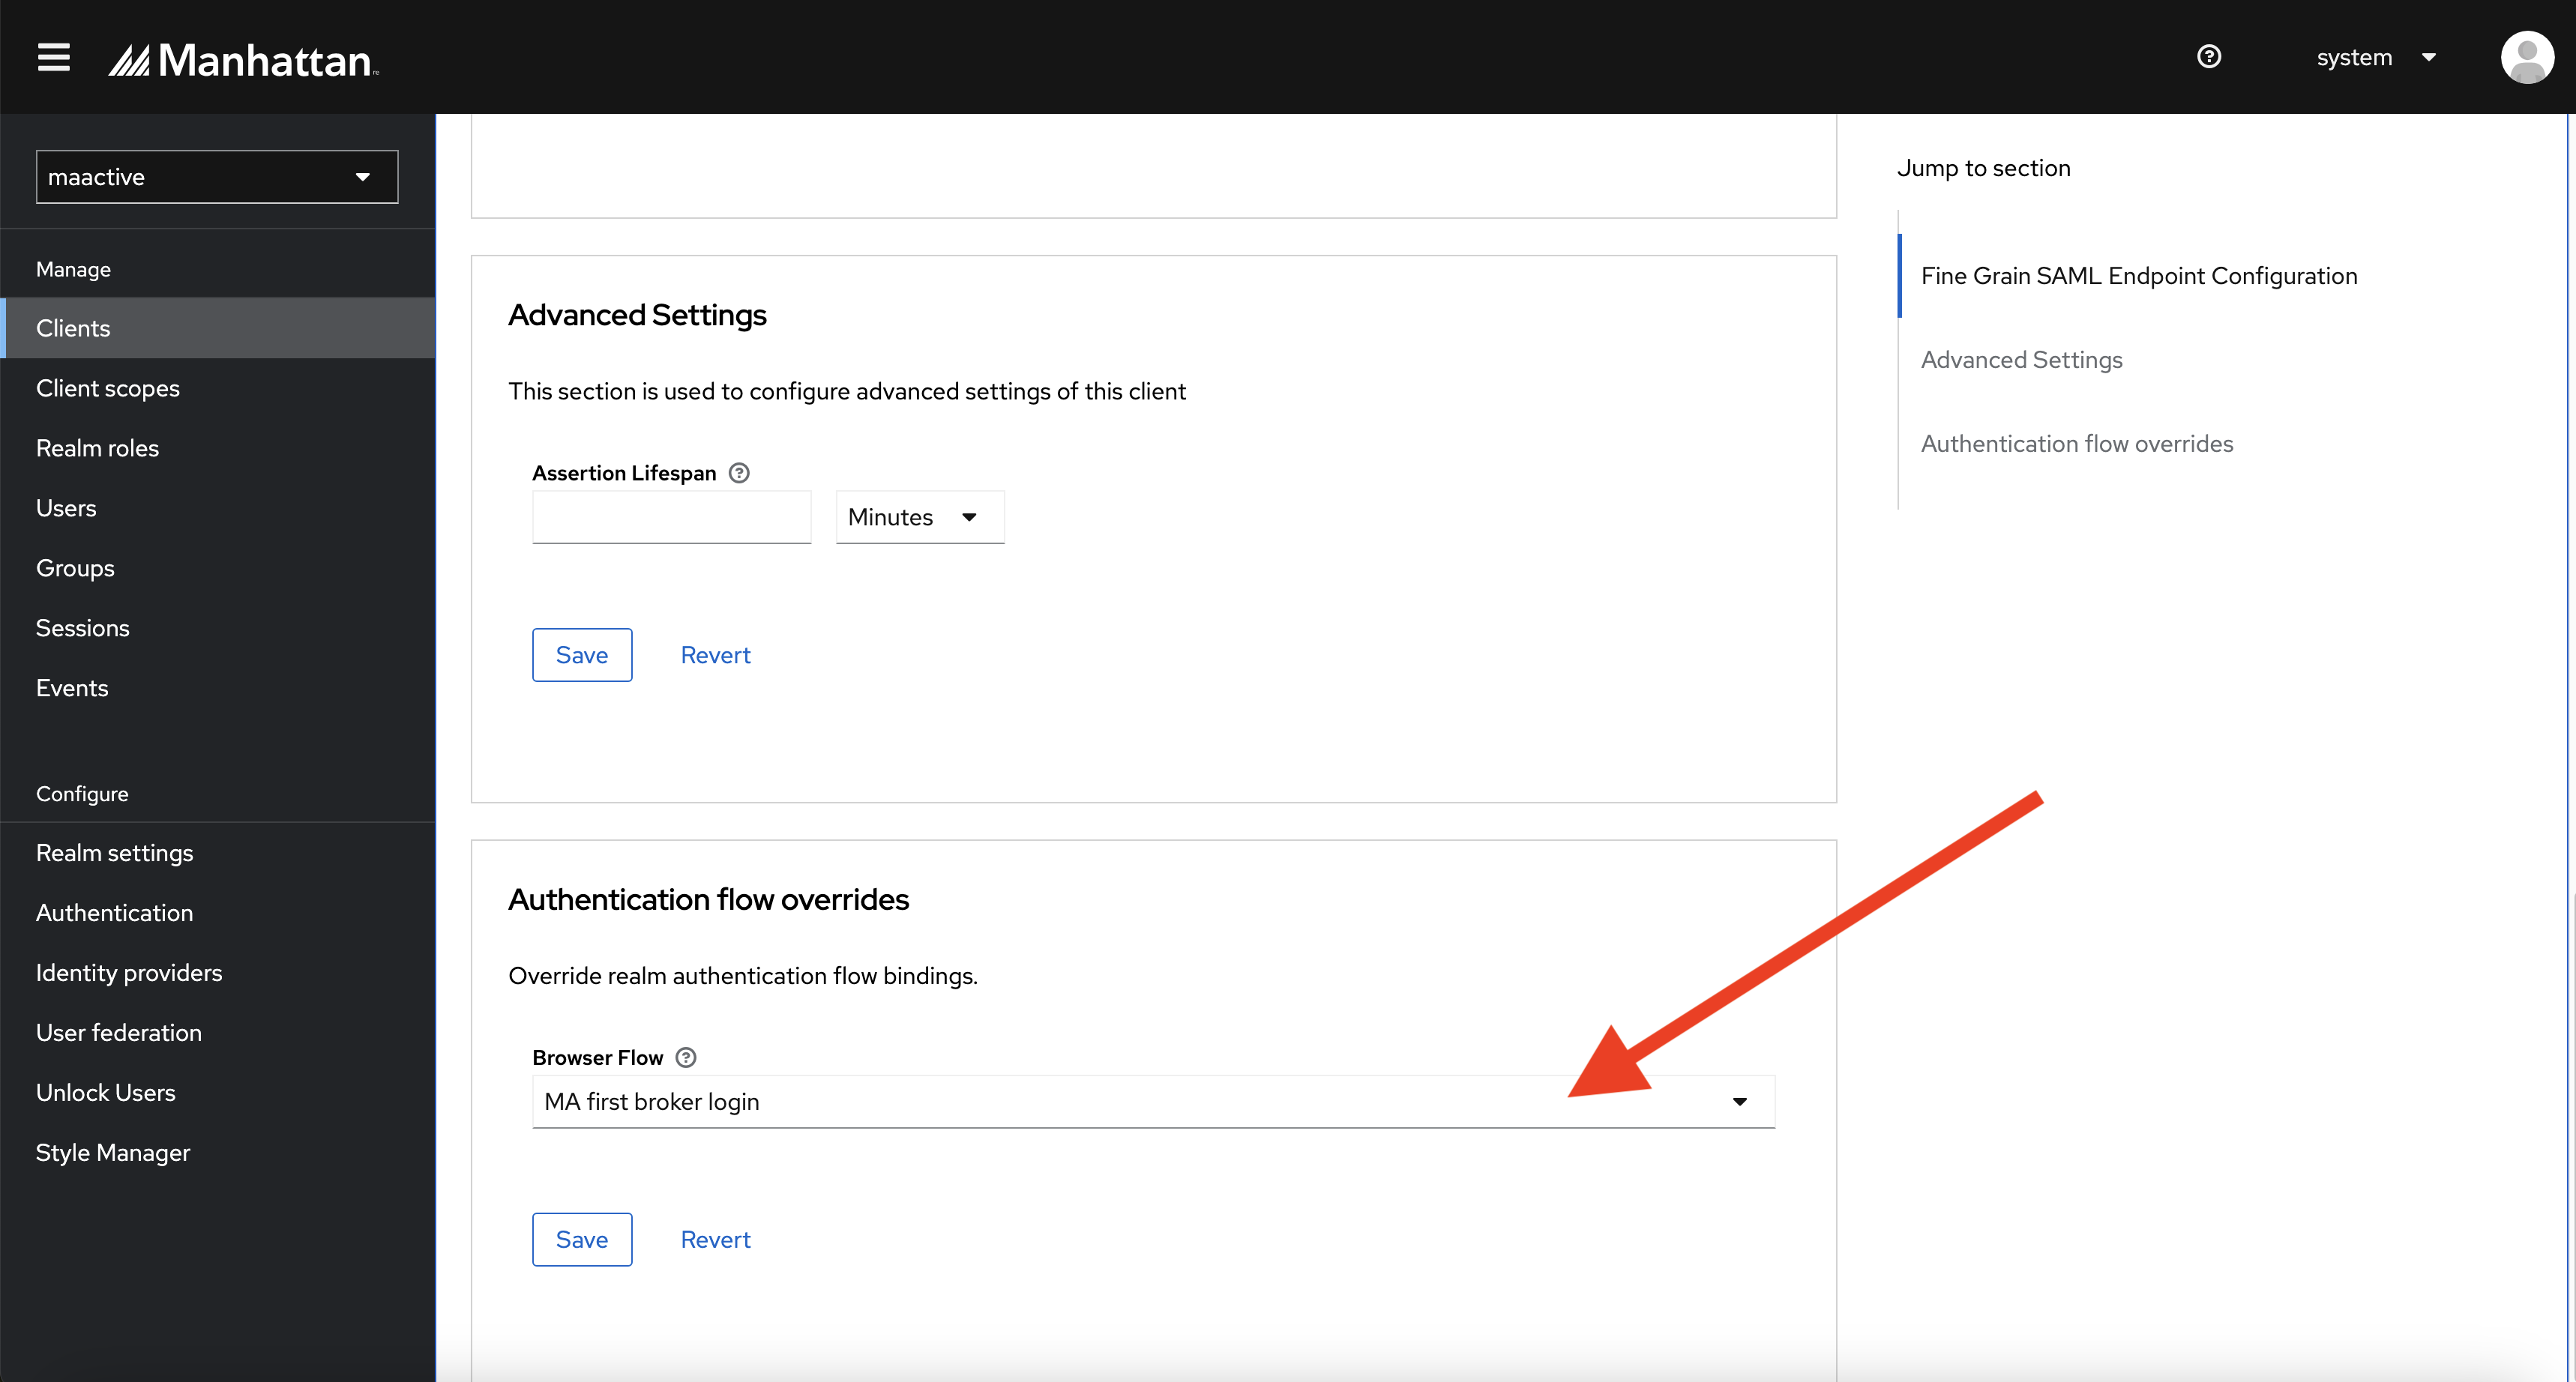
Step 9
Scroll down and select Browser Flow as MA first broker login from the dropdown. Click Save. This concludes all changes at AccessManagement 2.0’s end.
Section 2: Changes on IDP’s (Okta) end
Step 1
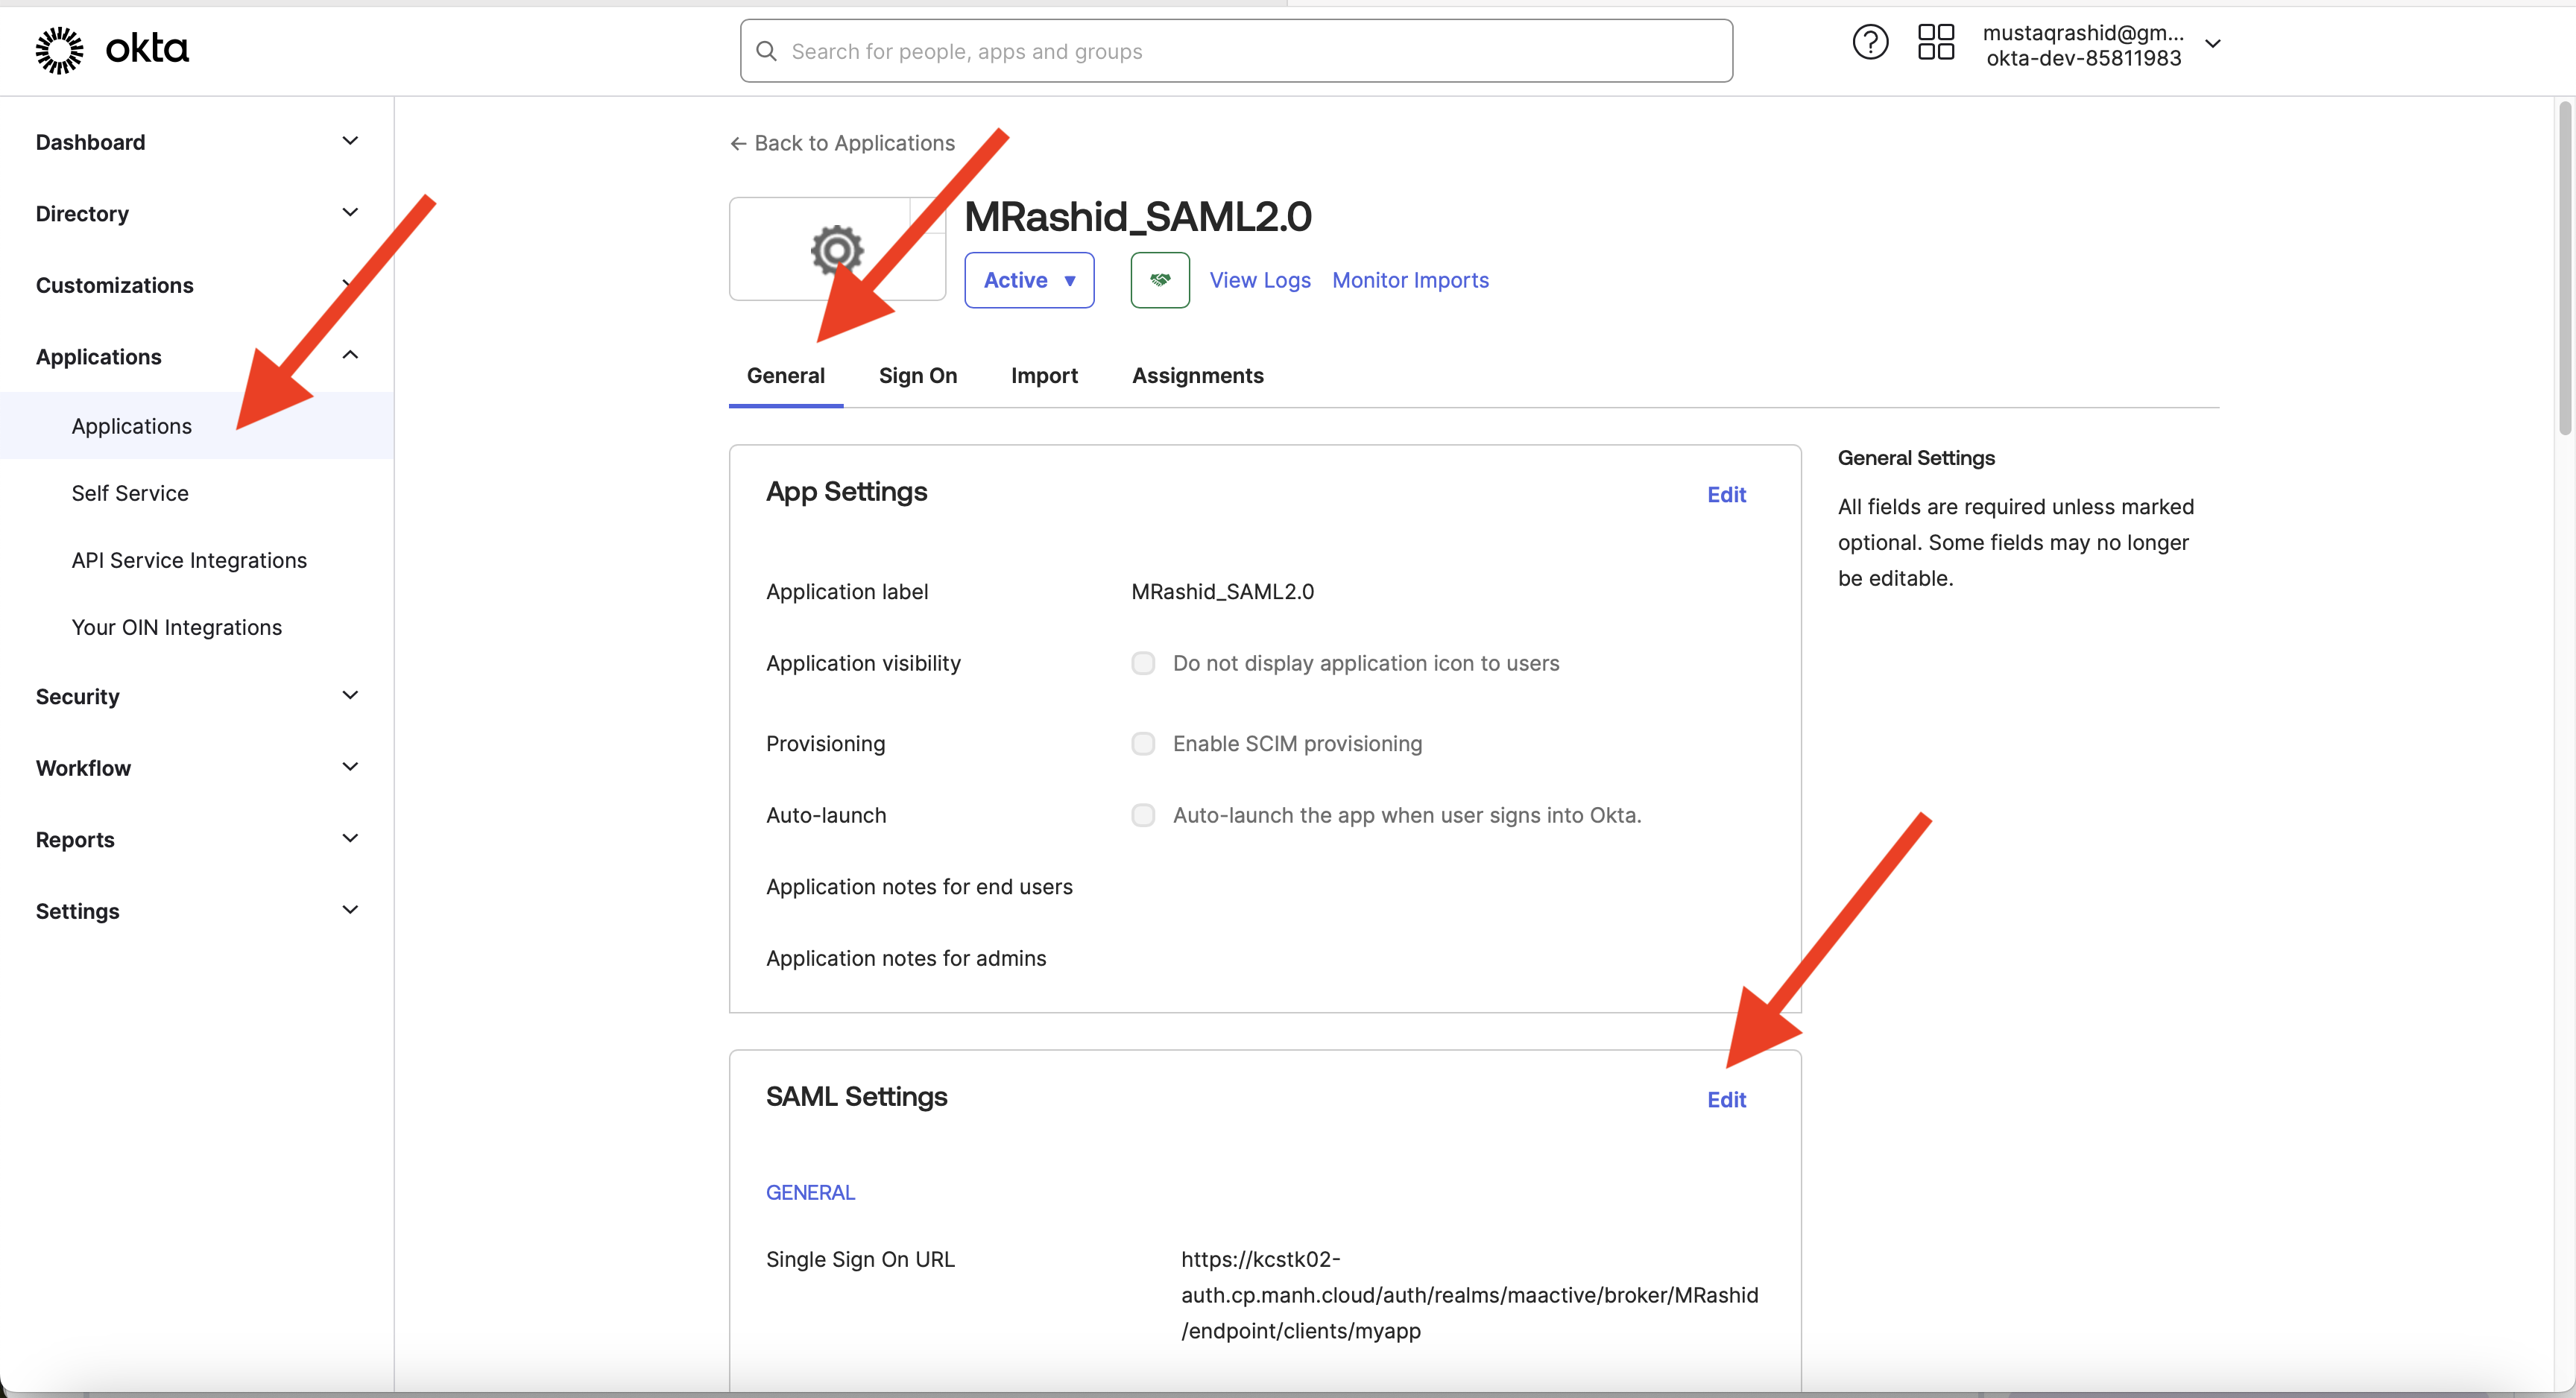
Log in to Okta, go to your application, and click on the General tab. Scroll down and click on Edit in the SAML settings section.
Step 2
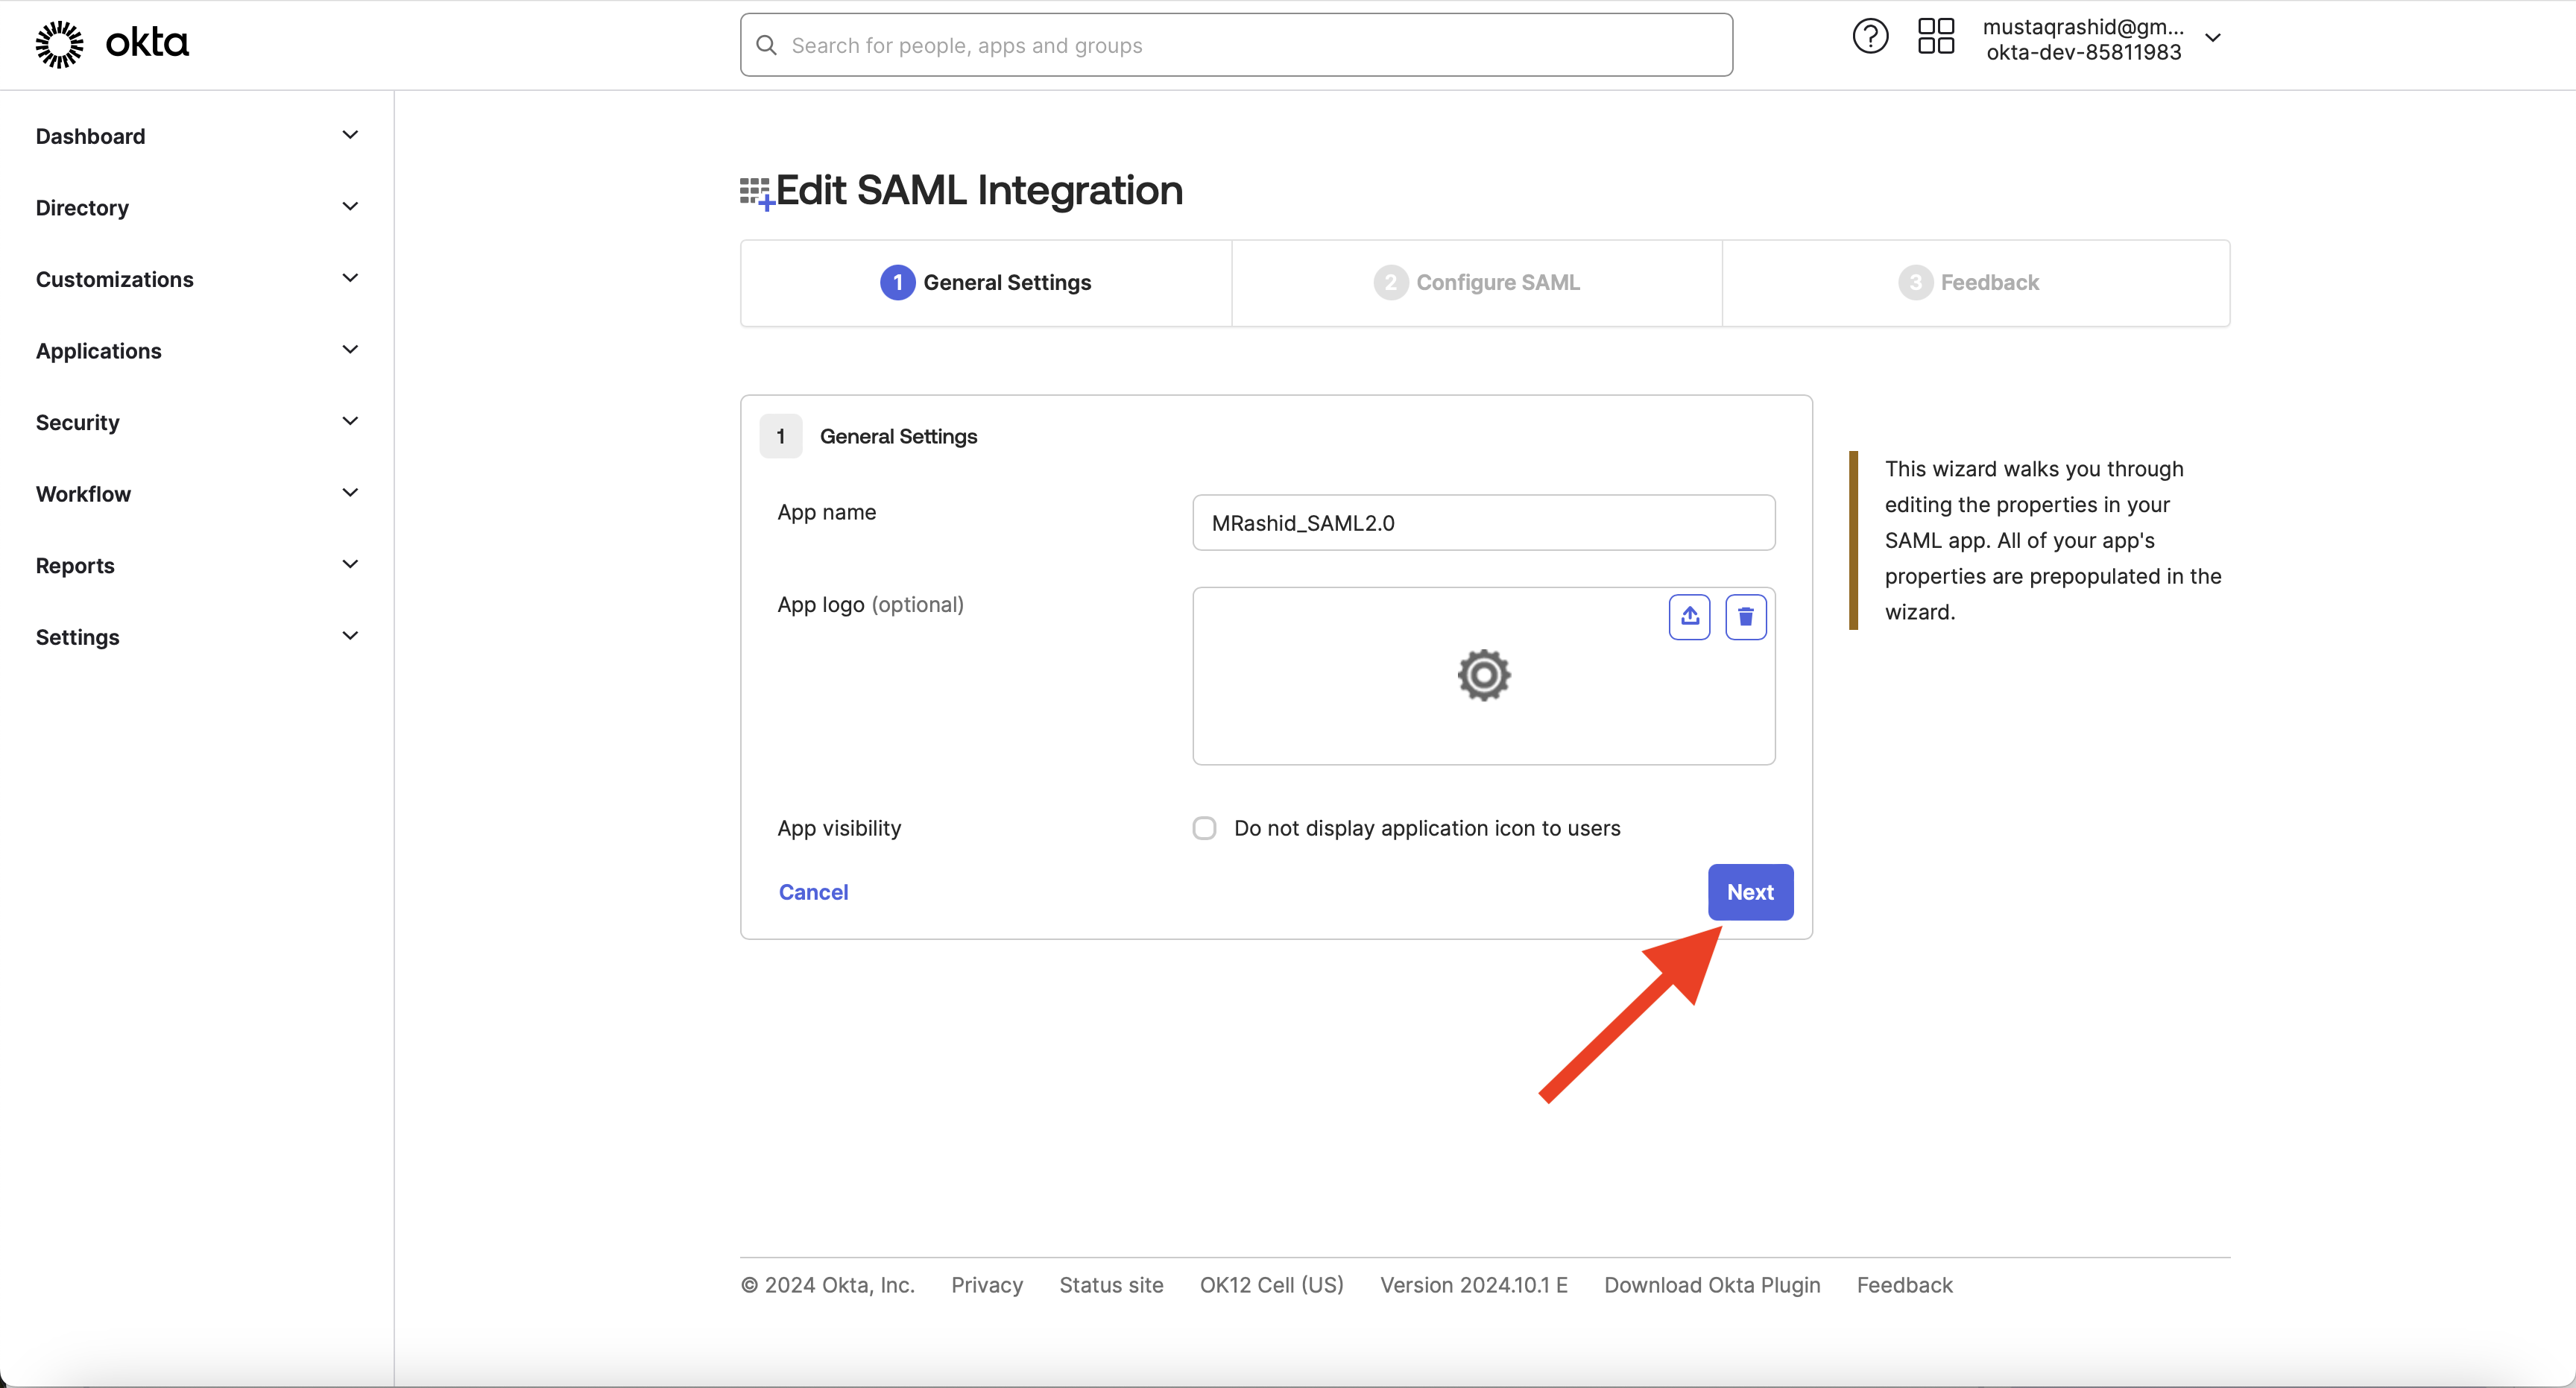
Click Next in the General Settings of the Edit SAML Integration section.
Step 3
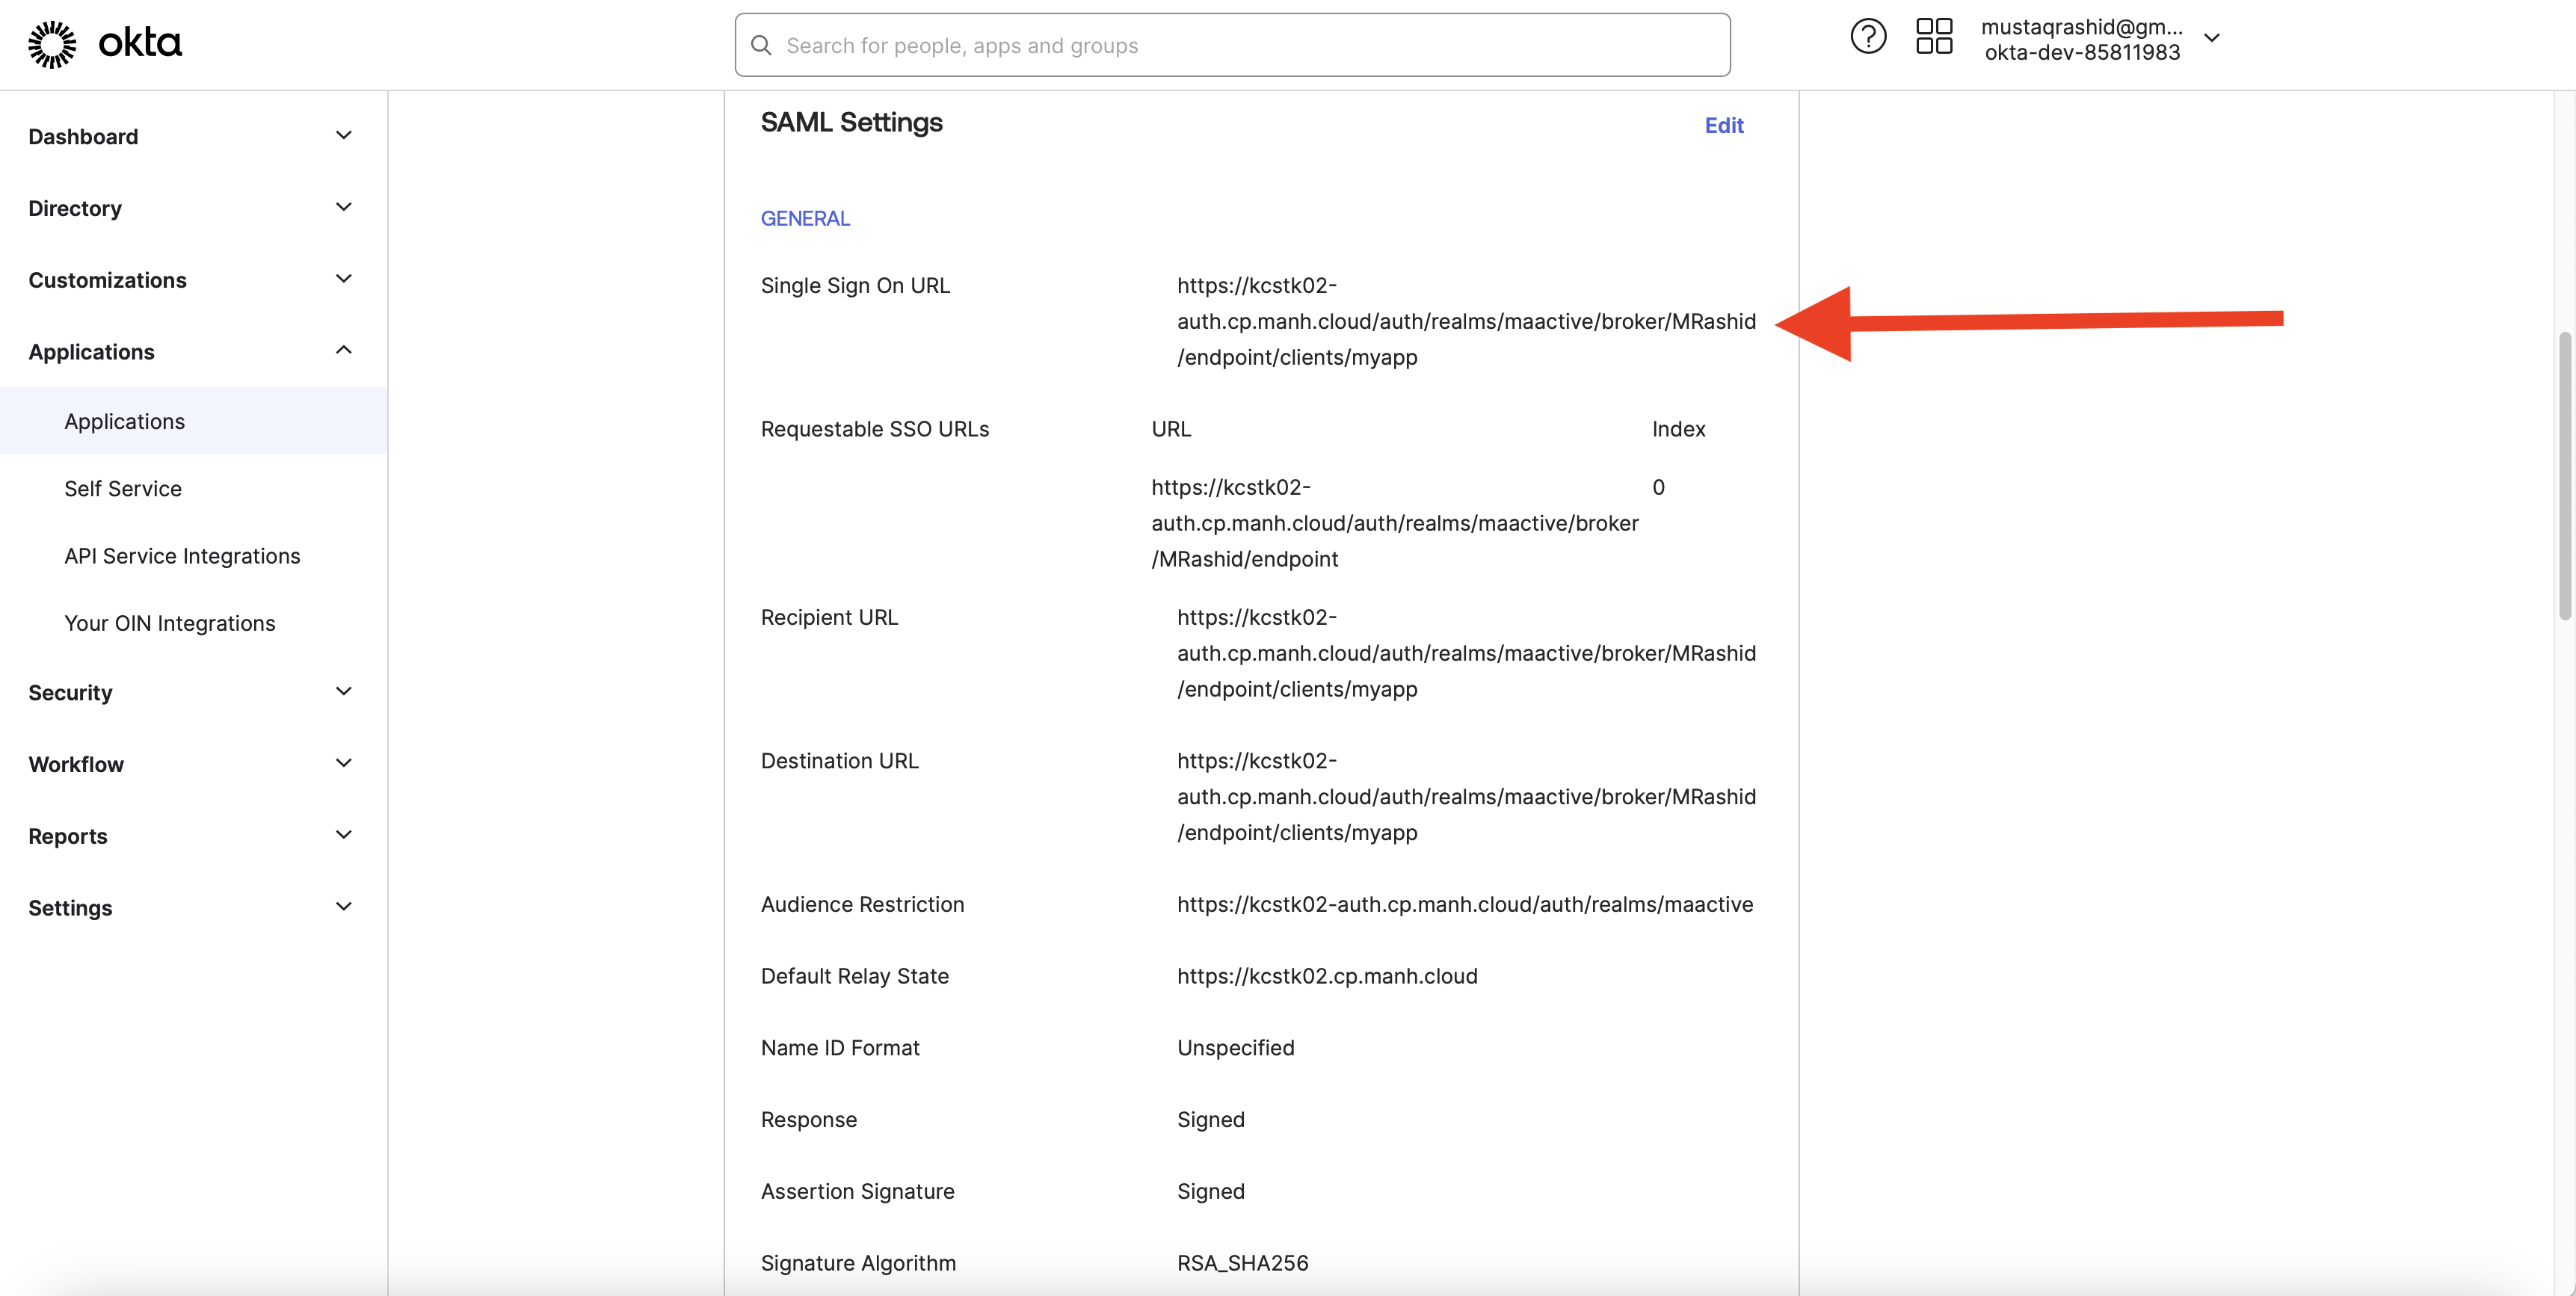
Compose the Single Sign On URL by entering the AssertionConsumerService (ACS) URL, followed by /clients/<name of your app>. The ACS URL can be obtained from the XML file imported in Step 2 of Section 1, and the app name is the name given in Step 3 of Section 1. This is the endpoint in AccessManagement 2.0 where the IDP sends the SAML assertion (authentication response) after a user has successfully authenticated.
Step 4
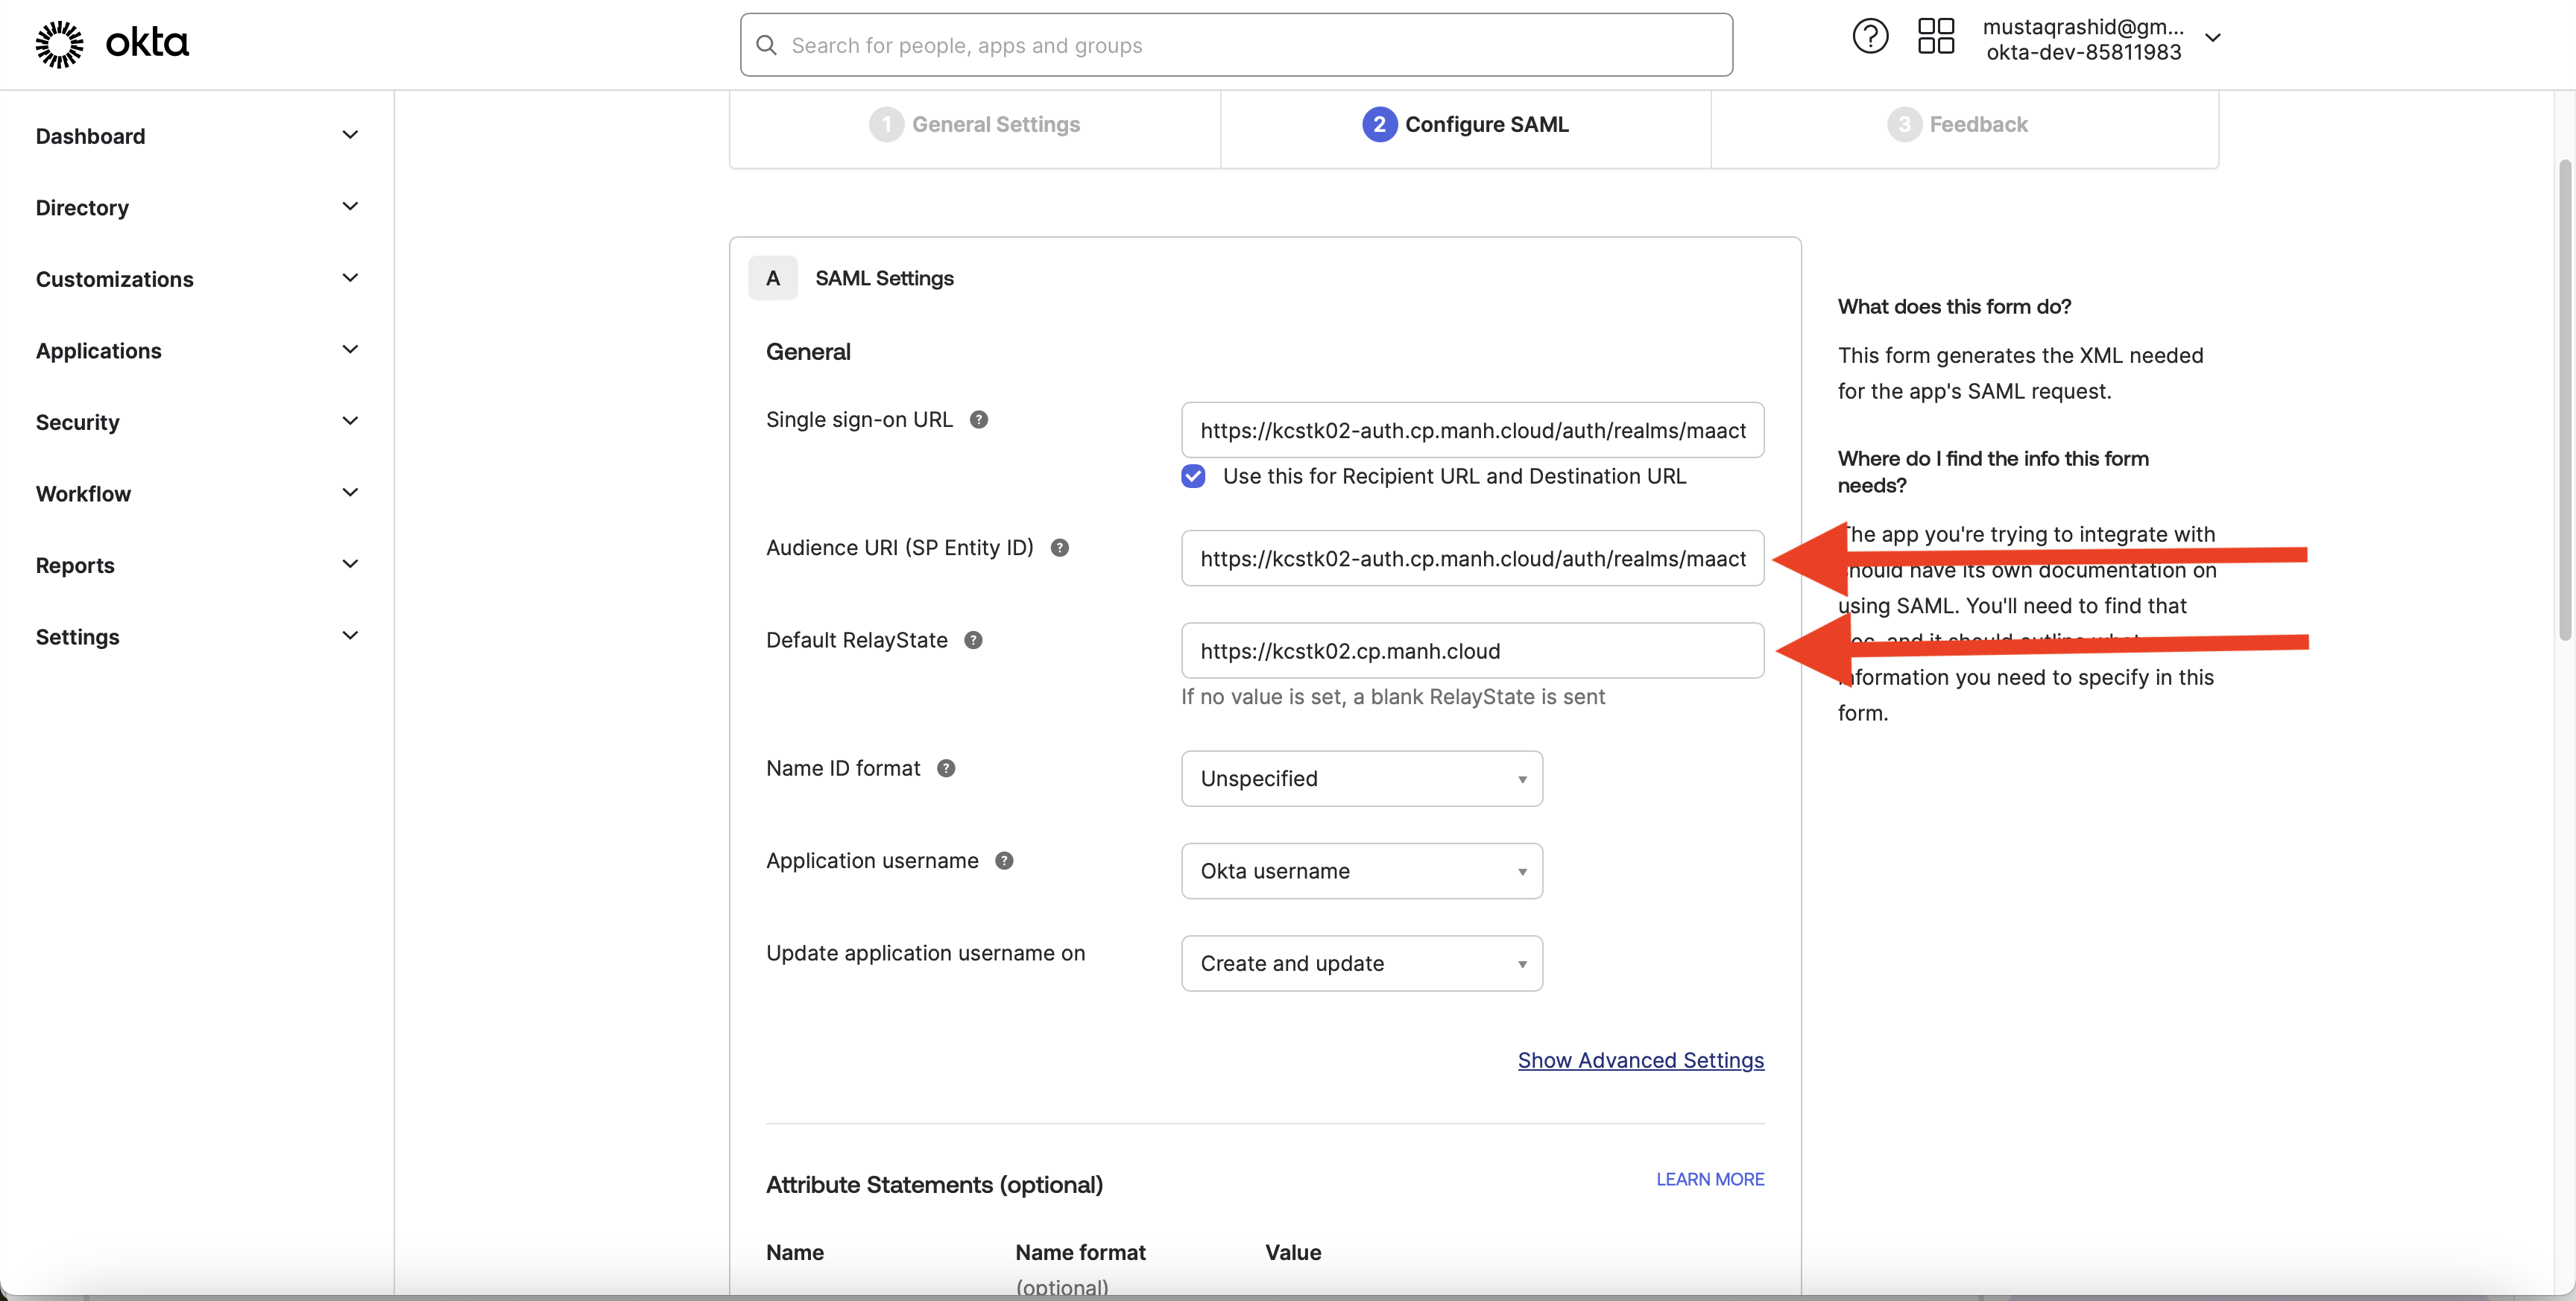
Ensure that the value of Audience URI (SP Entity ID) is the entityID. The entityID can be obtained from the XML file imported in Step 2 of Section 1. Also, enter the value of Default RelayState as the stack URL.
Step 5
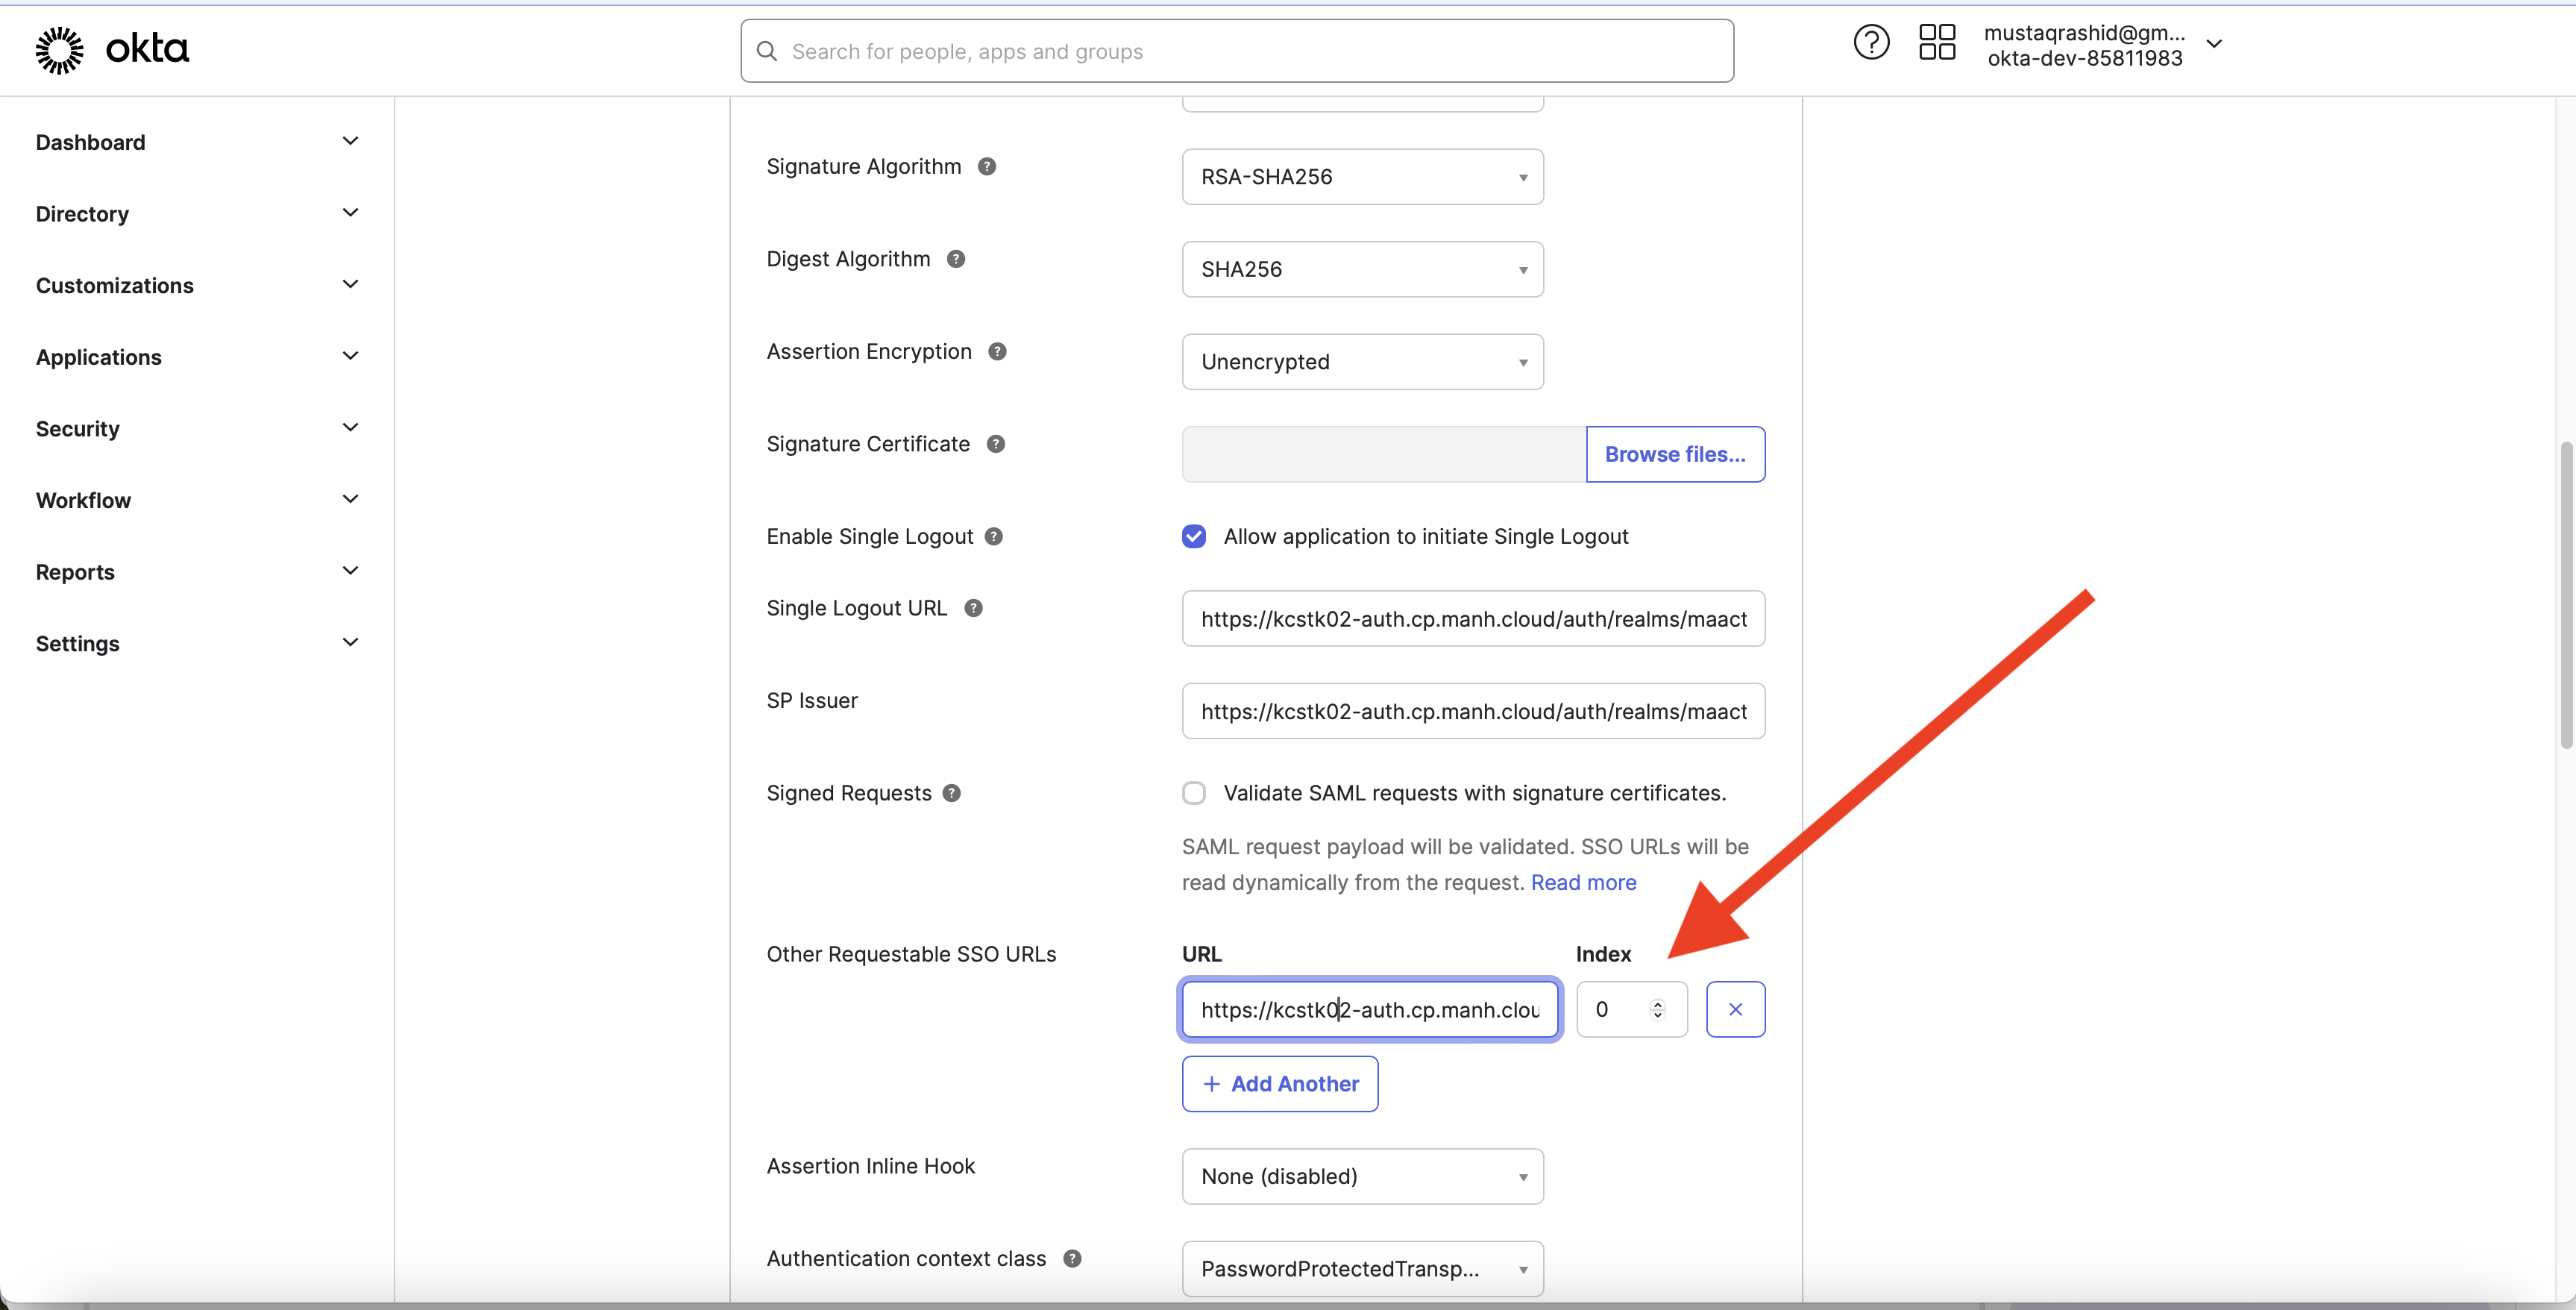
On the same page, click the Show Advanced Settings section and scroll down. Look for Other Requestable SSO URLs and enter the AssertionConsumerService (ACS) URL. The ACS URL can be obtained from the XML file imported in Step 2 of Section 1. This step is necessary if the same IDP has to work for SP-initiated flow as well. This concludes all changes needed on IDP’s(Okta) end.
Authors
- Mustaque Rashid, Technical Lead, R&D-Cloud platform.
- Kaveen Jagadeesan, Technical Director - Software Engineering, R&D-Cloud platform.
- Binit Datta, Technical Director - Software Engineering, R&D-Cloud platform.
Feedback
Was this page helpful?