Configure Azure Identity Providers
Objective
This page describes Azure Ad OIDC Setup with JIT and Non JIT Flows.
Integrating Access Management 2.0 with Azure OIDC
This section shows how to integrate Access Management 2.0 with Azure AD, where Azure will behave as an Identity Provider (IdP). The protocol used for authentication is OpenID Connect (OIDC). Steps involve creating an OIDC client on both sides.
Step 1: Identity provider in Access Management 2.0.
- Login to the Access Management 2.0 Admin console and select the correct realm, here it’s maactive.
https://mpsos-auth.sce.manh.com/auth/
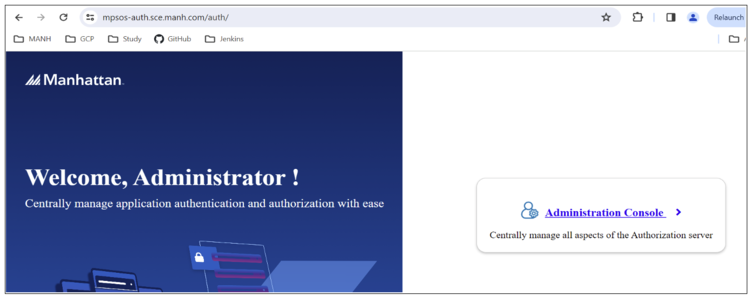
If you only have Restricted Admin Access, then use the URL.
https://<stack_short_name>-auth.<domain_name>/auth/admin/maactive/console/
- Verify the Realm.
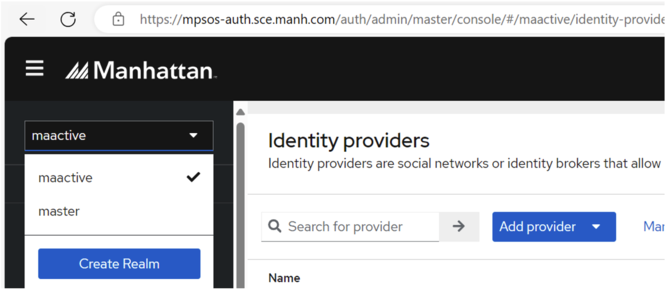
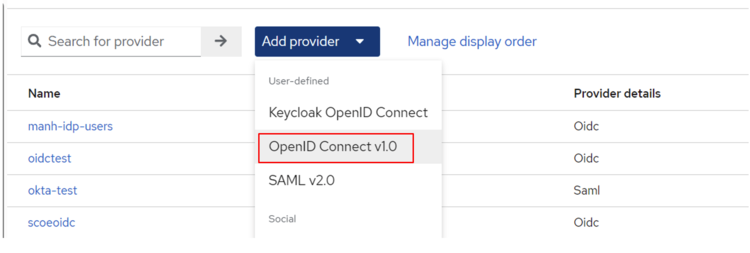
- Click Identity Providers → Add providers and select OpenID Connect provider from the list of providers.
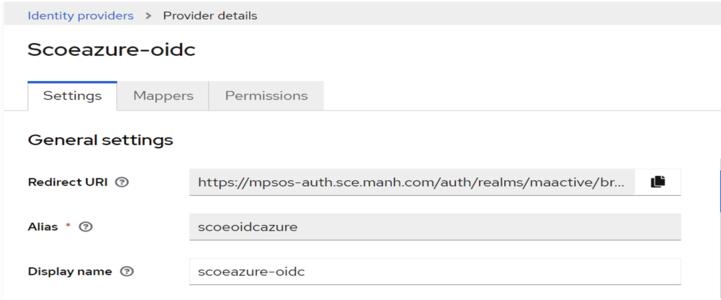
- Enter the Alias and the Display name.
Alias also forms part of the Redirect URL. For example, if Alias is scoeoidcazure, then the redirect URI is:
https://mpsos-auth.sce.manh.com/auth/realms/maactive/broker/scoeoidcazure/endpoint
Copy this redirect URI to register the application In Azure.
Step 2: OIDC App Registration in Microsoft Azure AD
The instructions described below can be used to integrate Manhattan Active Cloud Platform with Microsoft Azure AD Login:
- Login to https://portal.azure.com/#home as an Administrator or Co-Administrator to create a new Application.
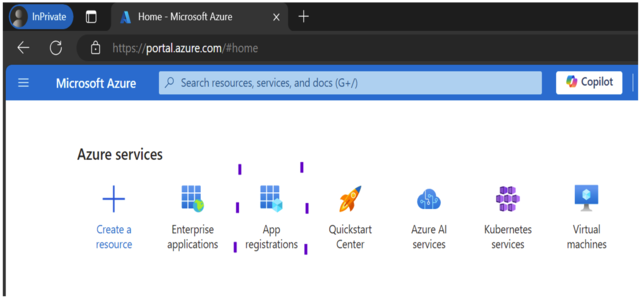
- Select App Registration from the homepage or search for the same from the search bar.
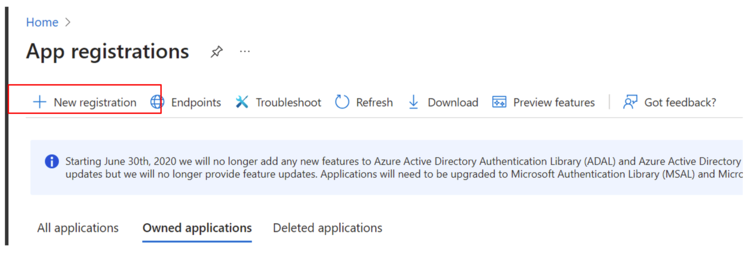
- Select New Registration to create an OIDC application.
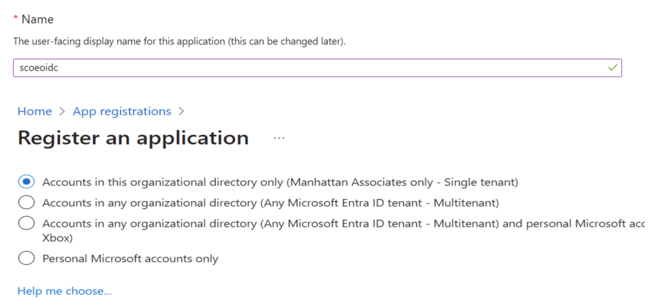
- Set the application name, select web application from the drop-down, and paste the redirect URI that has been copied from Access Management 2.0:
https://mpsos-auth.sce.manh.com/auth/realms/maactive/broker/scoeoidcazure/endpoint
Once the redirect URI is pasted, register the application.

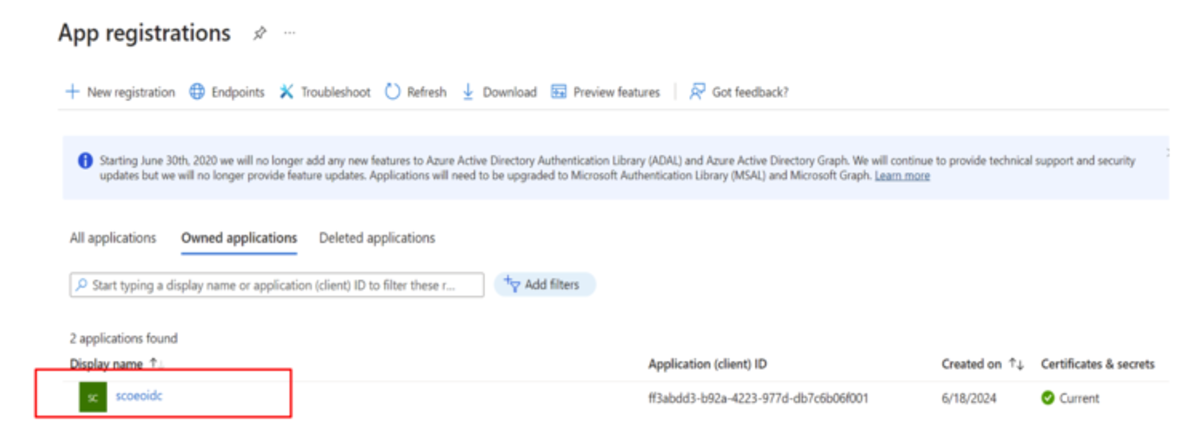
This creates the new application (client) in Azure Portal. Note down the client ID, which is also the application ID.
- Creation of client secret Key.
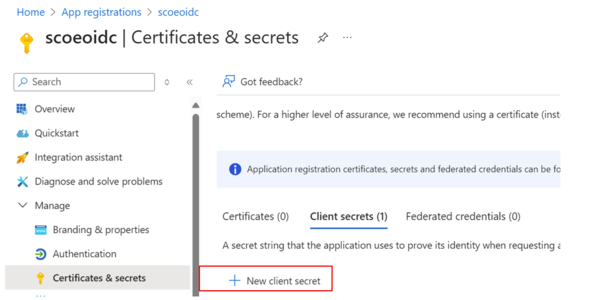
- Select the application (
scoeoidc) → select certificate and secrets to create a new secret key. - Select New client secret. Describe this secret. Hit Add.
- Select the application (
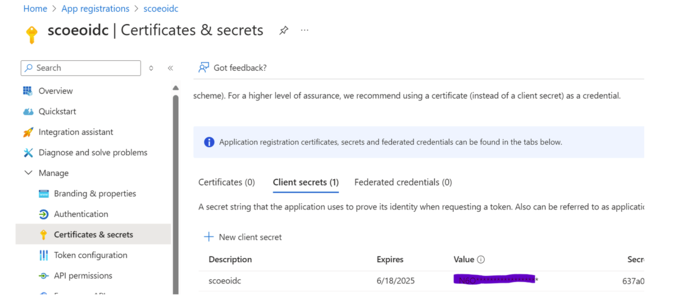
Note: Write down the Client secret value, and make sure you register the key “Value”.
This will be the only chance to capture the key. Never send the secrets over emails.

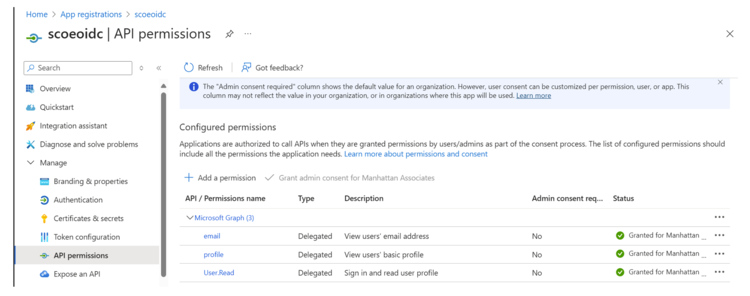
- Enable permission for this application
- Select API permissions.
- Click on Grant admin consent. Confirm in yes.
- Copy Endpoints for this client to configure in Access Management 2.0. These endpoints can be captured by clicking on Endpoints, as shown below.
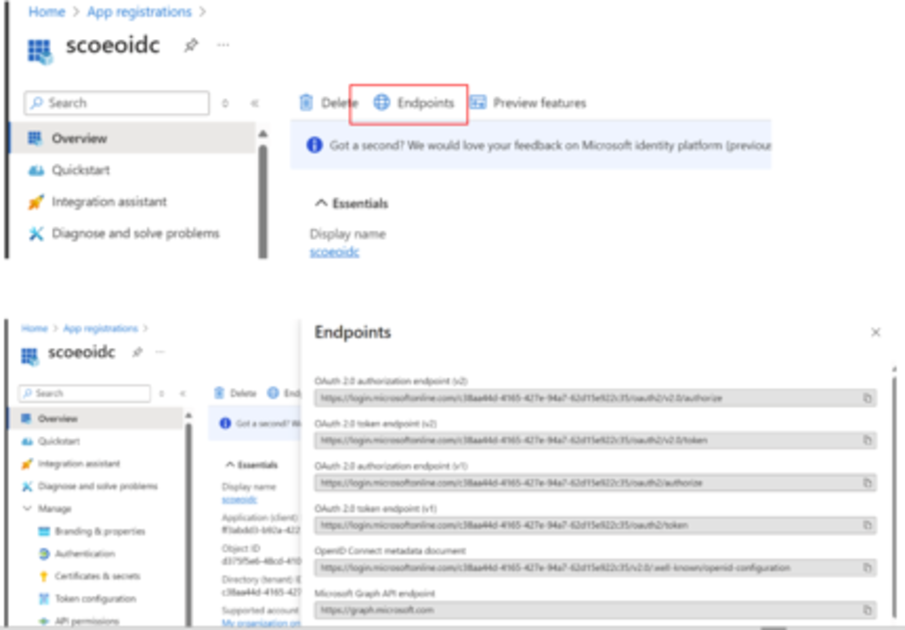
Copy the OpenID Connect metadata document (also known as the OIDC Well Known URL across the Security Industry, like SAML IdP Metadata) to configure it in Access Management 2.0.
Configure the OpenID Connect application using OpenID Connect Application Endpoints in Access Management 2.0.
- Assign the users or groups to this application in Azure.
Step 3: Integrating Access Management 2.0 with Azure OIDC
- Go to Access Management 2.0 Admin Console and paste the OpenID connect metadata in the Discovery endpoint as shown below (click on show metadata to see the rest of the endpoints).
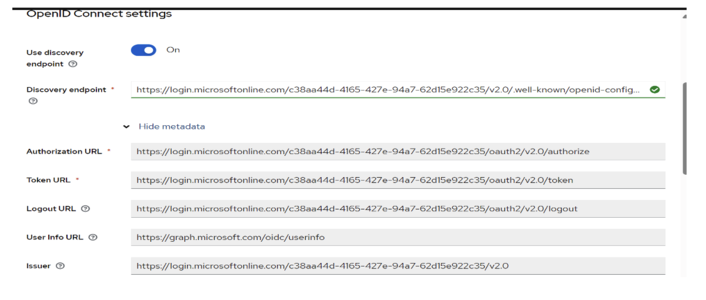
- Select Client Authentication as Client secret sent as basic auth, paste the client ID and Client secret value, then hit Add.

- Next, click on Advanced to add the default scopes as shown below.
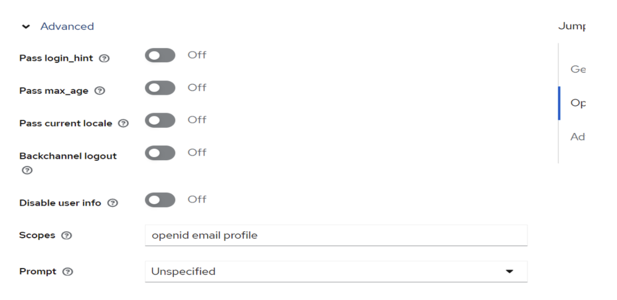
- Next, choose the First login flow as MA first Broker login if not yet configured.
Also, choose Post login flow as MA post login flow if not configured already. This is an important step, and it is needed for the IDP login to work fine.

- Ensure users were added to the application with appropriate roles.
This completes the integration of Access Management 2.0 and Azure using the OIDC protocol.
- Click on the application URL and use the icon in the UI to log in through Azure-ODIC. A better-looking screen is expected soon. The number of IdP Login buttons/Options will depend on how many IdPs the user has configured within Access Management 2.0. In our case, it is
scoeazure-oidc.
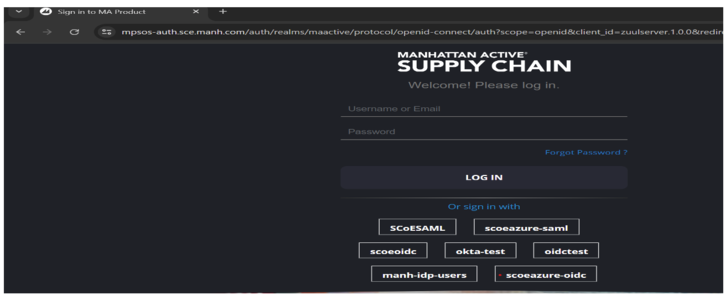
Step 4: Enabling JWT-OIDC-JIT - Azure
In case Just In Time (JIT) User Provisioning is not needed, please skip this step 4.
If JIT needs to be enabled, we need to add six mandatory mappers on each side in Access Management 2.0, as well as Azure.
- To add mappers in Access Management 2.0, go to the Access Management 2.0 provider configuration page, select the identity providers (
Scoeazure-oidc), and click on the Mappers tab.
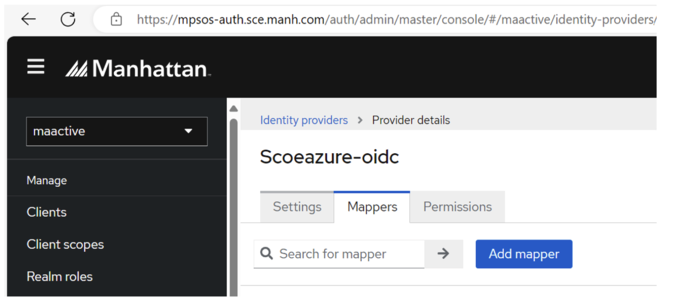
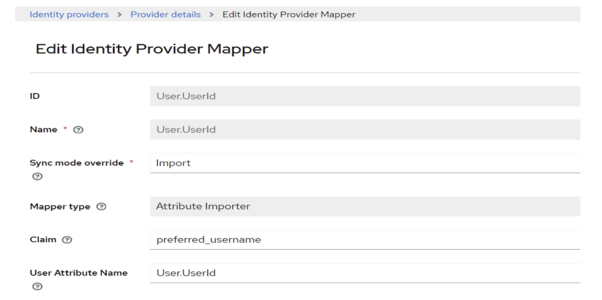
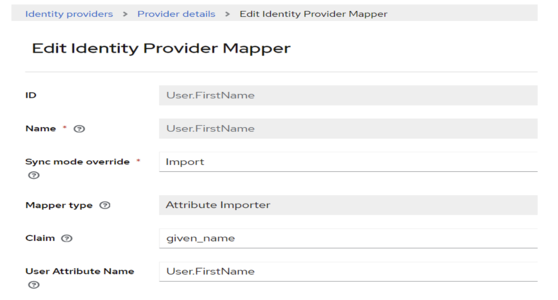
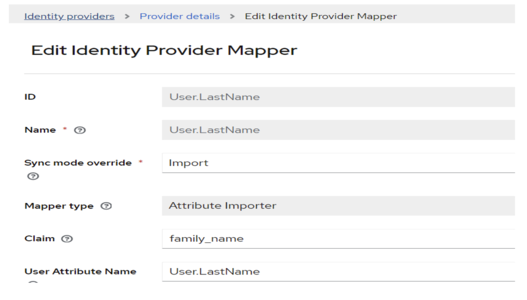
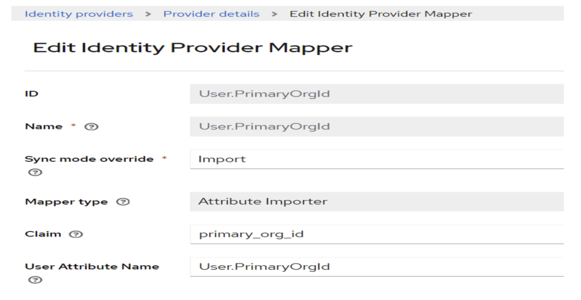
Click on Add mapper and create the below mappers by filling in the fields as shown in the screenshots below.
- User.UserId:
- User.FirstName:
- User.LastName:
- User.Primary_Org_Id:
- User.Roles:
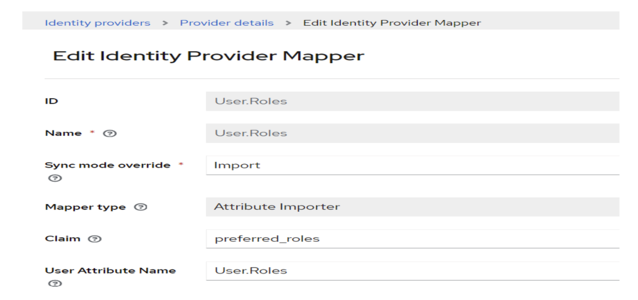
- User.LocaleId:
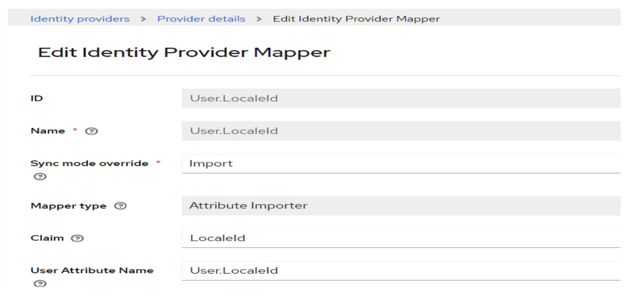
Step 5: Adding Custom claims in Azure AD
Login to Azure portal https://portal.azure.com/#home
We have multiple options in Azure AD to pass the required claims in the response token.
Steps for Enabling Optional claim for OIDC in Azure:
- In AZURE AD, go to Token Configuration → Add optional claim ID → select preferred_username and add available required claims as well.
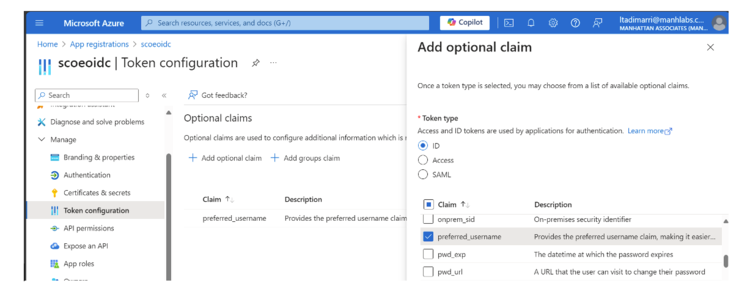
If we do not have options to pass the required attributes/claims in token configuration, we can pass it through managed claims.
Go to Enterprise applications →
Single Sign-on → Attributes and claims. Go to Enterprise applications and search for the application (in our case:
scoeoidc)
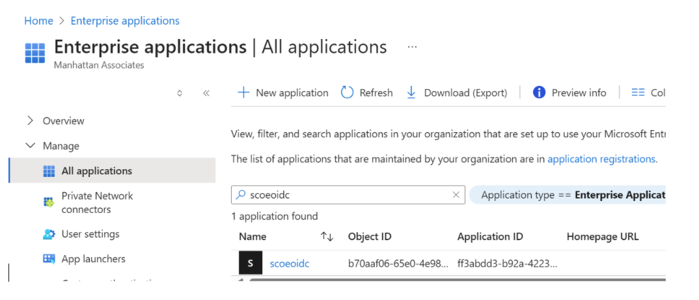
- Select the application and click on the Single sign-on Tab.
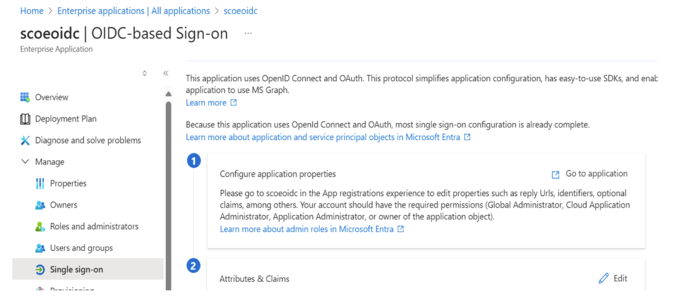
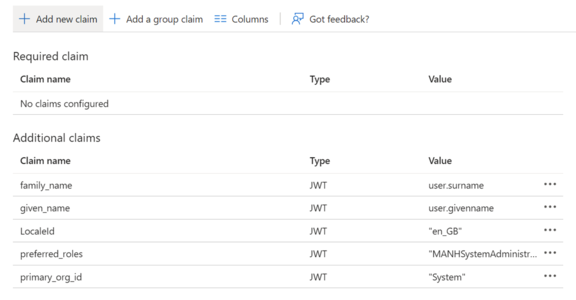
Edit the attributes & Claims. Click on Add new claim. Provide the Claim Name and the Source attribute value:
- primary_org_id
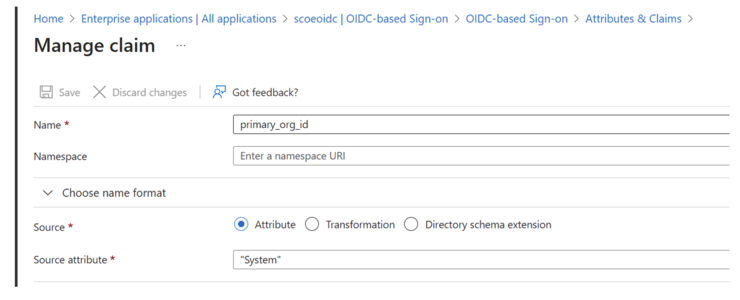
Similarly, add other attributes as well.
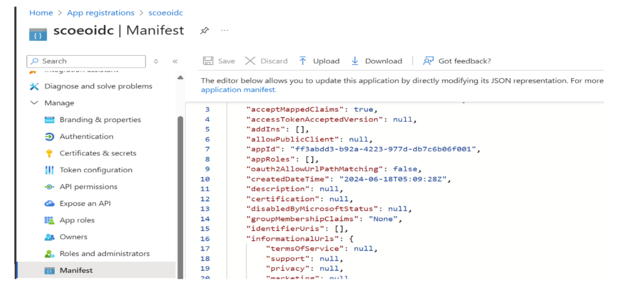
- To make these changes work and send the attributes in the ID token, we need to update the acceptMappedClaims to true in the application manifest.
Go to App registrations → <application name(scoeoidc)> → manifest.
Next, assign users to this application.
Once the above steps are performed, the user will be created in the application.
- JWT Token response using Postman.
We can check the sent claims/attributes in the JWT token response using Postman. Use the token endpoint, client ID, and client secret key to get the token response ID of the user in Postman.
POST Request:
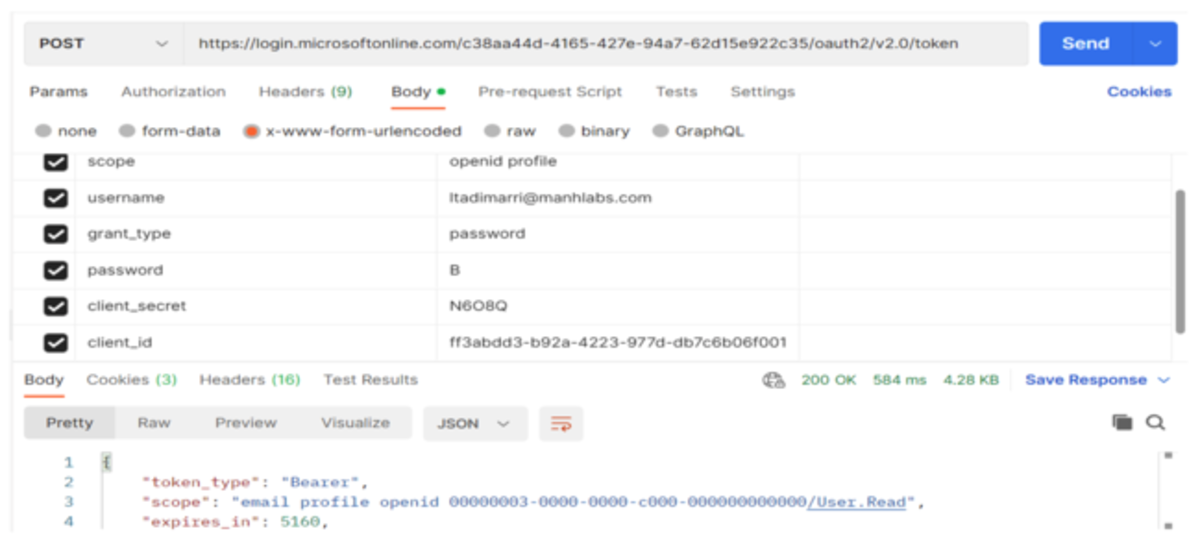
A successful request would get HTTP 200 OK responses having an ID token and access token, as shown below.
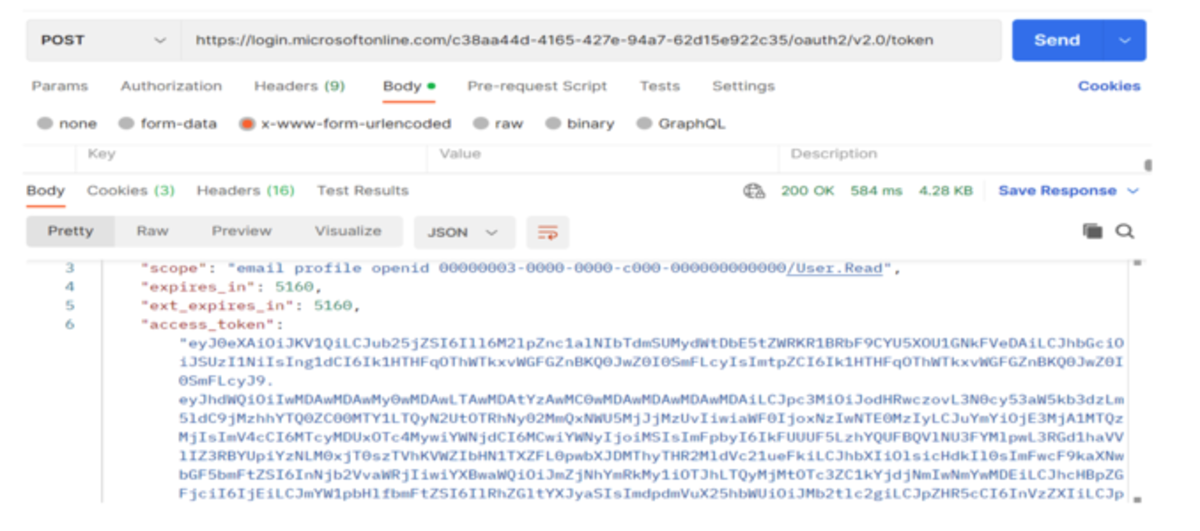
- Go to https://jwt.io/ and paste the ID token in the debugger to know what response is sent from the token.

Step 6: JWT-OIDC-JIT Required claims in Azure.
Note: Please take special care to make sure values mapped to your Identity Provider do not have any unwanted spaces, commas, or other invalid characters before or after the values.
The attributes in the table below can be configured on both IDP and SP by following the steps above.
| Azure OIDC Claim Name |
|---|
| primary_org_id |
| given_name |
| family_nam |
| LocaleId/locale |
| birthdate |
| user_orgs |
| locations |
| gender |
| street_address |
| street_address2 |
| locality |
| region |
| postal_code |
| country |
| phone_number |
| zoneinfo |
| available_user_locales |
Feedback
Was this page helpful?